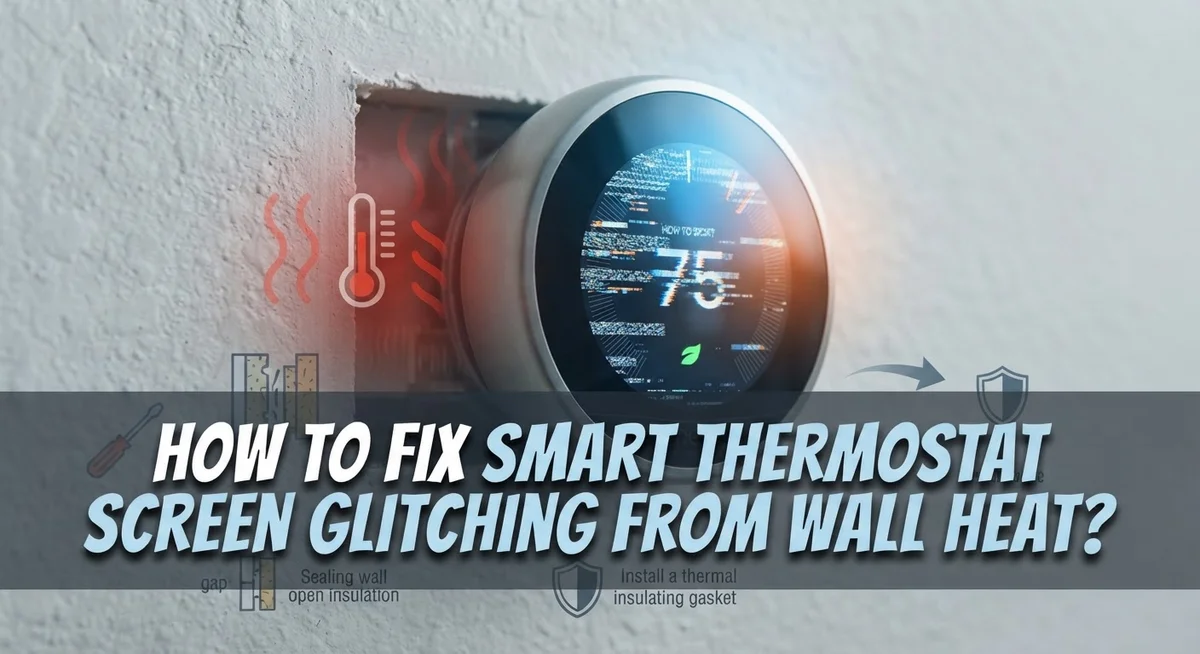
How To Fix Smart Thermostat Screen Glitching From Wall Heat?
Does your smart thermostat screen flicker or glitch near the wall heater? You are not alone. Many homeowners notice this problem right after installing a new thermostat.
The good news? Wall heat itself rarely causes the glitch. In most cases, the real issue is power instability inside your thermostat wiring.
A missing or loose C-wire often triggers this annoying flicker. Sometimes a simple wiring mistake creates the same effect. Your thermostat needs steady power to keep the screen stable.
In a Nutshell
- Power issues cause most glitches, not the heat from your wall unit. A missing or loose C-wire is often the true culprit.
- Restart your thermostat first. This simple step fixes many display problems in seconds.
- Check the C-wire connection at the wall plate terminals. Loose wires create unstable power.
- Reseat the faceplate and tighten every wiring connection. Snug wires mean a steady picture.
- Swap in fresh batteries. Old batteries can starve your thermostat of the power it needs.
- Inspect your circuit breaker and the HVAC power switch. A tripped breaker stops power flow completely.
- Try Electric Perm mode if your thermostat offers it. Hold the enter button to activate this setting.
- Confirm your 24V supply is stable. Voltage swings often show up as screen flicker.
- Match your wiring to your system type. Gas furnaces, electric furnaces, and heat pumps each need correct setup.
Why Wall Heat Gets Blamed for Screen Glitches
Wall heat gets blamed for screen glitches because people notice the flicker happens near their heating unit. This seems like a logical connection. However, the actual culprit is almost always power instability, not the heat itself.
Your smart thermostat screen needs a stable electrical supply to function properly. When power dips or becomes inconsistent, the display flickers, blinks, or goes blank. Wall heaters operate on high power draws. Many homeowners assume this electrical demand somehow interferes with the thermostat. In reality, the thermostat sits on a separate 24-volt circuit from your heating system.
The real issue happens behind the scenes at your wall plate. A missing C-wire (common wire) leaves your thermostat running on battery power alone. This creates an unstable power situation. When your heating system kicks on, it can trigger minor voltage fluctuations in your home’s electrical system. These tiny dips are enough to make a battery powered thermostat screen glitch.
Another reason wall heat gets blamed is timing. Many people notice the glitch most during winter when their heater runs frequently. The thermostat screen flickers, the heater is running, and people connect the two events. This correlation feels like causation, but it is misleading.
The thermostat itself is not broken. Your system is simply struggling to maintain steady power. This is why restarting the thermostat often fixes the problem temporarily. A restart resets the display and restores the power connection.
Understanding this distinction matters because it points you toward the right fix. You should focus on power stability, not on moving your thermostat away from wall heat. Check your C-wire connection first. Verify your wiring is tight and secure. These steps address the actual problem and stop the glitching for good.
Understanding the Real Cause: Power Instability and the C-Wire
Your smart thermostat screen glitches because of power instability, not the heat radiating from your wall. This is the most important fact to understand before you troubleshoot anything else.
Here’s what happens. Your thermostat needs a steady electrical supply to display information and respond to your commands. When power fluctuates, the screen flickers, blinks, or goes blank. Most people assume the wall heater causes this because the glitching seems to happen when heating runs. That’s coincidence, not causation.
The C-wire delivers continuous power to your thermostat. Without it or with a loose connection, your device relies on battery backup or stealing power from other wires. Both methods create unstable voltage. Your screen suffers the consequences immediately.
Think of it like this. A lamp needs steady electricity to shine brightly. Flicker the switch on and off, and the light stutters. Your thermostat works the same way. Power instability causes the stutter you see on your screen.
Another reason power matters is 24-volt voltage stability. Your HVAC system generates 24 volts to power the thermostat. If this voltage drops below the required threshold, your device struggles. The screen glitches as the thermostat tries to stay operational with insufficient power.
Most people overlook the C-wire first. They focus on the wall heater because it’s visible and obvious. But the real culprit hides inside your wall plate terminals. A missing C-wire connection or a loose wire at the terminal causes 90 percent of screen glitching problems.
The good news is straightforward. Once you stabilize the power supply, the glitching stops. You don’t need to move your thermostat or install a new one. You simply need to fix the electrical connection behind your wall plate. That’s where the solution lives.
Step-by-Step Fix: Restarting and Reseating Your Thermostat
Start by powering down your thermostat completely. Hold the power button or switch for 10 seconds. Wait 30 seconds, then power it back on. This simple restart often clears temporary glitches caused by software hiccups or power fluctuations.
Next, turn off the power at your circuit breaker before touching any wiring. This keeps you safe while you work. Look at your wall plate where the thermostat connects to your HVAC system.
Check every wire connection at the wall plate terminals. The C-wire (usually blue or black) should be firmly seated in its terminal. Pull each wire gently to confirm it does not slip out. Loose connections cause the flickering you see on your screen.
Now examine the faceplate itself. Gently pull the thermostat faceplate away from the wall plate. Look for any bent pins or misaligned connectors. Reseat the faceplate by pressing it firmly back into place until you hear a click or feel it lock.
Tighten the terminal screws at the wall plate using a small screwdriver. Turn each screw clockwise until snug. Do not overtighten, as this can damage the terminal.
If your thermostat uses batteries, replace them with fresh ones. Old batteries cannot deliver stable power, even if they appear to work.
Return to your circuit breaker and flip the breaker back on. Restore power to your HVAC system using the main switch near your furnace or heat pump.
Turn the thermostat back on and observe the screen for 2 minutes. If glitching continues, the power supply remains unstable.
Check the voltage at your wall plate using a multimeter. You should see 24 volts between the R and C terminals. If voltage reads lower than 22 volts, your transformer needs attention.
These steps address the actual problem: unstable electrical supply to your device, not the heat from your wall.
Checking Wiring, Terminals, and Voltage for Stable Power
Your smart thermostat’s screen glitch stems from power problems, not wall heat. The wiring and terminals at your wall plate control the electrical flow to your device. Let’s check them systematically.
Start by turning off power at your circuit breaker. This keeps you safe while inspecting the connections. Wait 30 seconds before proceeding.
Remove your thermostat faceplate from the wall plate. You’ll see colored wires connected to labeled terminals. Common terminals include R, C, W, Y, and G. Each wire delivers a specific function to your system.
Examine each wire connection closely. Look for wires that sit loose in their terminals or appear partially disconnected. A wire touching the terminal but not fully seated causes intermittent power loss. This creates the blinking screen effect you’re experiencing.
Pull each wire out gently and reinsert it firmly into its terminal. You should hear a small click when it seats properly. Repeat this process for every connected wire.
Next, use a small screwdriver to tighten the terminal screws. Turn clockwise slowly until snug. Don’t over tighten, as this strips the screw. A firm connection prevents power fluctuations.
The C-wire deserves special attention. This wire provides continuous power to your thermostat. If your C-wire is missing or loose, your device relies on battery power alone. Battery power causes screen flickering during high demand periods.
After reseating and tightening all connections, turn the circuit breaker back on. Restore power to your thermostat and wait two minutes. The screen should display normally without blinking.
If glitching continues, check your circuit breaker status. A tripped breaker cuts power intermittently. Reset it by flipping the switch fully off, then back on.
Stable wiring connections eliminate most screen glitches. Proper terminal contact ensures your thermostat receives consistent electrical power throughout operation.
Enabling Electric Perm Mode and Confirming Heating System Type
Once you’ve confirmed your wiring is secure and your power supply is stable, the next step is enabling Electric Perm mode. This mode stabilizes your thermostat’s operation when it detects power fluctuations.
To enable Electric Perm mode, locate the enter button on your thermostat’s faceplate. Hold this button for approximately 5 to 10 seconds until you see a menu appear on the screen. Look for an option labeled “Electric Perm” or “Permanent Electric Mode.” Select this option using your thermostat’s navigation buttons.
Electric Perm mode forces your thermostat to draw power continuously from your heating system’s transformer. This eliminates reliance on battery backup during power dips. The mode is particularly useful if your C-wire connection is weak or intermittent.
After enabling Electric Perm mode, your screen should stabilize within 30 seconds. If glitching persists, proceed to confirm your heating system type.
Identifying your heating system is critical because different systems require different thermostat configurations. Check your furnace or heat pump unit in your basement or mechanical room. Look for a label on the unit itself.
Gas furnaces have a pilot light or electronic ignition and burn fuel for heat. Electric furnaces use heating elements similar to a space heater. Heat pumps look like air conditioning units and reverse their cycle for heating.
Your thermostat’s settings must match your system type. If you selected the wrong heating system during initial setup, your thermostat cannot communicate properly with your HVAC unit. This misconfiguration causes screen glitches and erratic behavior.
Access your thermostat’s settings menu and navigate to “System Type” or “Heating Mode.” Verify the selection matches your actual equipment. If you selected the wrong type, change it now and save your settings.
Once Electric Perm mode is active and your heating system type is confirmed, your screen glitching should resolve. These two adjustments address both power stability and system communication issues.
Common Mistakes That Cause Screen Glitching to Return
Many people make simple mistakes that cause screen glitching to return even after they’ve tried basic fixes. Understanding these errors helps you avoid repeating them and keeps your thermostat working smoothly.
The first mistake is overlooking loose R-wire connections. The R-wire carries power from your heating system to your thermostat. People often focus only on the C-wire and miss that the R-wire terminal might be slightly loose. Always double-check both wires during inspection.
Another common error is failing to verify your circuit breaker status before troubleshooting. Your breaker might have tripped without you realizing it. A tripped breaker cuts power to your thermostat completely, causing the screen to flicker or go blank. Check your breaker box first, even if it seems obvious.
Many people also skip the step of confirming their heating system type. Your thermostat needs different settings depending on whether you have a gas furnace, electric furnace, or heat pump. If you configure it for the wrong system type, power delivery becomes unstable and glitching returns.
Not waiting long enough after fixes is another mistake. After you tighten connections or enable Electric Perm mode, give your thermostat at least 30 seconds to stabilize. People often assume the fix failed because the screen still glitches immediately. Patience matters here.
Finally, people sometimes reuse old or corroded batteries when they should replace them entirely. Old batteries provide inconsistent power, which triggers screen problems again. Always use fresh batteries when troubleshooting battery-powered models.
The key is being systematic about each step. Don’t skip verification stages or rush through connections. Take time to confirm every element of your power supply before moving forward. This approach prevents glitching from returning and saves you frustration.
Troubleshooting Persistent Glitches and Emergency Heat Alerts
When your smart thermostat screen keeps glitching despite fixing wiring connections, the problem often points to power instability rather than the heating system itself. Screen flickering happens because your thermostat isn’t receiving steady electrical power.
The first action is to restart your thermostat completely. Turn off power at your circuit breaker for 30 seconds, then turn it back on. This simple reset clears temporary power hiccups that cause persistent glitches.
Next, verify your circuit breaker hasn’t tripped. Walk to your electrical panel and check if the breaker controlling your HVAC system is in the ON position. A tripped breaker cuts power intermittently, which makes your screen blink repeatedly.
Battery issues also trigger ongoing glitches. Replace your thermostat’s backup batteries with fresh ones immediately. Old or weak batteries cannot maintain power during brief electrical interruptions, causing the display to flicker.
If glitching continues, measure the voltage at your thermostat’s terminals using a multimeter. Your system should show 24 volts consistently. Anything lower indicates a transformer problem in your HVAC unit that needs professional attention.
Emergency heat alerts appearing alongside screen glitches signal a different issue. This mode activates when your thermostat detects a heating system malfunction. Check whether your furnace or heat pump is actually running. Listen for sounds from your heating unit and feel warm air from your vents.
If your heating system runs fine but emergency mode keeps activating, your thermostat’s sensors may be faulty. This requires professional diagnosis since internal sensor problems cannot be fixed with DIY troubleshooting.
Document exactly when glitches occur. Do they happen during specific times or weather conditions? This information helps identify whether the problem stems from power demand spikes or actual equipment failure.
Persistent glitches after checking power, batteries, and circuit breakers usually mean your thermostat needs professional service or replacement.
Final Thoughts
Screen glitching feels frustrating, but the fix is usually simple. Most problems trace back to power instability, not the wall heat itself.
Your thermostat needs steady power to work right. A missing or loose C-wire causes most flickering issues you see.
Start with the basics every time. Restart your thermostat first before trying anything else.
Check your wiring connections next. Loose R-wires and C-wires cause more glitches than people realize.
Fresh batteries matter more than you think. Old or corroded batteries create power gaps that trigger screen problems.
Your circuit breaker deserves a quick look too. A tripped breaker cuts power and causes the exact glitching you’re seeing.
Enable Electric Perm mode if your system supports it. This feature gives your thermostat continuous power from the transformer.
Take time to identify your heating system correctly. Gas furnaces and electric systems need different thermostat setups to work properly.
Emergency heat alerts need separate attention. These signals often point to sensor problems rather than wiring issues.
Being systematic saves you time and frustration. Work through each step in order instead of jumping around randomly.
Most screen glitches resolve within thirty minutes of proper troubleshooting. Patience during this process leads to better results.
Don’t skip steps just because they seem minor. Small oversights like corroded batteries or loose connections cause big headaches later.
If problems persist after trying everything, consider calling a professional. Some wiring issues need expert hands to diagnose safely.
Your thermostat should work reliably once power stays stable. Most homeowners fix this problem without needing extra tools or help.
Keep this guide handy for future reference. Screen glitches happen again sometimes, especially after power outages or system changes.
Stable power remains the real solution here. Focus your energy there first, and the flickering screen will disappear.
Frequently Asked Questions
Why does my thermostat screen blink when the wall gets hot?
Wall heat doesn’t directly cause screen blinking. The real culprit is unstable power supply to your thermostat. When your heating system runs, it can create electrical fluctuations that starve your thermostat of steady voltage. Your device needs continuous power (24V) to display correctly. If power dips even slightly, the screen flickers or blinks.
Check your C-wire connection first. This wire provides constant power. A loose or missing C-wire is the most common reason for blinking screens.
What’s the difference between a blinking screen and a blank screen?
A blinking screen means your thermostat is receiving some power but it’s unstable. The device cycles on and off rapidly.
A blank screen with occasional blinks suggests severe power loss. Your thermostat may not have enough voltage to stay awake.
Both problems point to the same root cause: power instability. Start by checking your C-wire connection and circuit breaker status.
Can I fix screen glitching without calling an electrician?
Yes, most people can fix this themselves. Start with these steps: restart your thermostat completely, verify your C-wire is connected properly, reseat your faceplate, replace batteries with fresh ones, and check your circuit breaker.
If your thermostat has an “Electric Perm” mode, enable it by holding the enter button. This forces the device to run on battery backup power while you troubleshoot.
Only call a professional if you’re uncomfortable working with electrical connections or if these steps don’t resolve the issue.
Does emergency heat mode mean my thermostat is broken?
Not necessarily. Emergency heat activates when your thermostat detects a system malfunction. Screen glitching can trigger this alert as a safety measure.
If your heating system works fine but emergency mode keeps appearing, your thermostat’s sensors may need attention. This is different from simple power instability.

Hi, I’m Rosie Tate — a tech enthusiast, gadget geek, and the creator of RapidConvertLab! 🚀 I’ve spent years exploring the ever-evolving world of electronics, smart devices, and Amazon’s hidden tech treasures. Through my honest, hands-on reviews, I help everyday shoppers cut through the noise and pick gadgets that truly deliver value. When I’m not testing a new device, I’m probably unboxing one! 📦✨