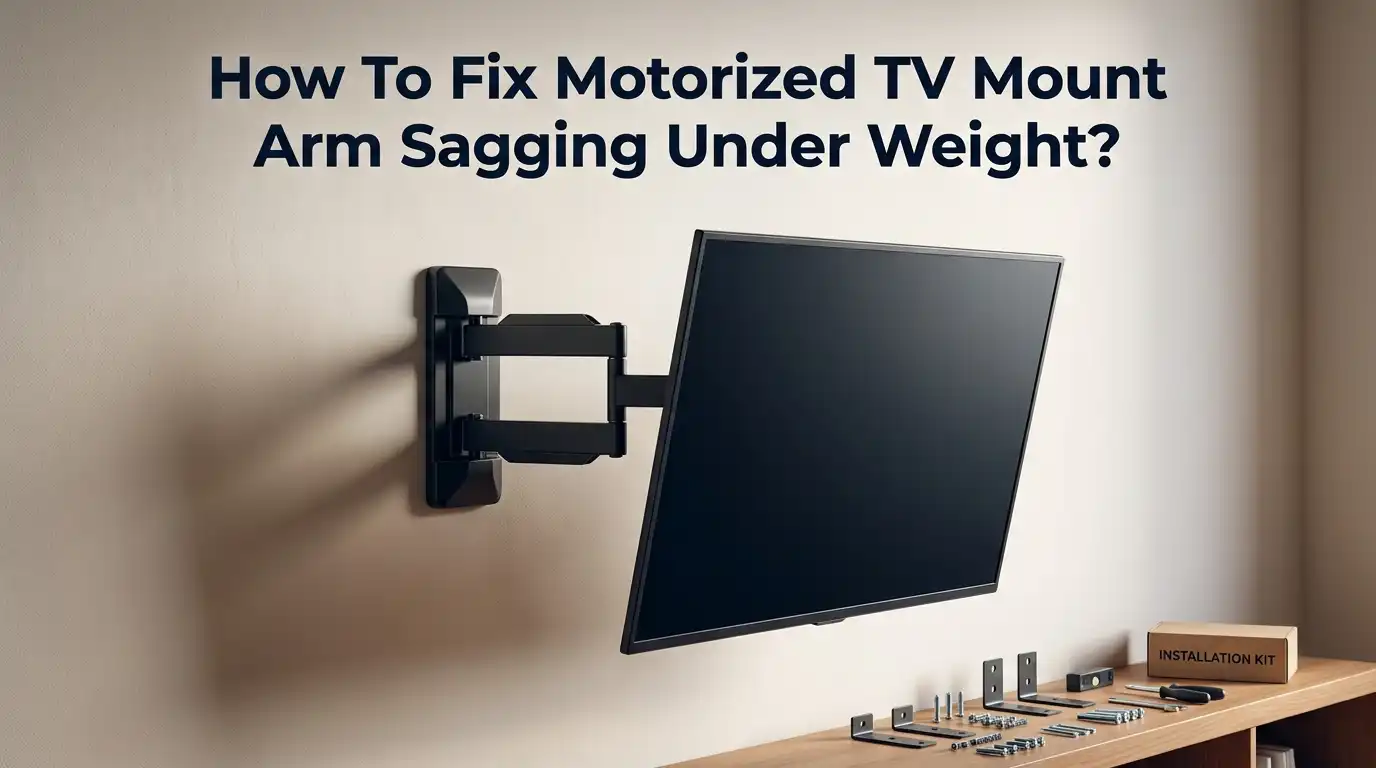
How To Fix Motorized TV Mount Arm Sagging Under Weight?
A sagging TV mount arm can turn movie night into a stressful situation. Your screen tilts down. It creaks when you adjust it. You worry it might fall.
This problem happens more often than you think. Motorized TV mount arms face constant strain from gravity and weight. Over time, this pressure causes parts to loosen or wear out.
The good news is that you can fix this issue yourself. You do not need to call a professional right away. Most sagging problems come from simple, fixable causes.
In a Nutshell
- Check the weight limit first. Your TV might be too heavy for the mount arm. Always match your TV weight to the mount rating.
- Tighten loose bolts and screws. Vibrations from daily use can loosen hardware over time. A simple tightening often solves the drooping issue.
- Inspect the internal gears. Worn or stripped gears inside the motor housing lose their grip. This makes the arm unable to hold its position.
- Test the motor strength. A weak or failing motor cannot support the TV weight anymore. You may need a replacement motor unit.
- Look at the mounting plate. A cracked or bent plate causes uneven pressure on the arm. This pressure leads to visible sagging.
- Add support brackets if needed. Extra bracing can help older mounts handle heavier screens. This is a great backup fix for aging equipment.
Understanding Why Motorized TV Mount Arms Sag
A motorized TV mount arm sags because several mechanical and structural issues work together over time. Understanding these causes helps you fix the problem correctly.
Weight distribution plays a major role in sagging. When your TV sits on the arm, gravity pulls downward constantly. If the mount design cannot handle that specific weight, the arm gradually bends or tilts downward. Heavy TVs stress the motor and support structure more than lighter models.
Motor failure is another common culprit. The electric motor inside the mount loses power as it ages. A weakened motor cannot lift or hold the TV arm in its original position. The motor may still turn on, but it lacks the strength to maintain proper alignment.
Gear wear happens inside the motor housing. Gears mesh together to create lifting and lowering motion. When these gears strip or wear down, they slip under load. A slipping gear cannot grip properly, so the arm sinks downward instead of staying level.
Loose hardware creates additional problems. Bolts, screws, and fasteners vibrate loose from daily use and TV weight. When these connections weaken, the arm loses stability and begins to sag unevenly.
Structural damage to the mounting plate also causes issues. Cracks, bends, or warping in the metal plate reduce its ability to support weight. A damaged plate distributes pressure unevenly across the arm.
Age and fatigue affect all mounts eventually. Metal fatigues after years of holding weight. Components degrade slowly, and sagging develops gradually as materials weaken.
Identifying which cause affects your specific mount helps you choose the right repair solution. Most sagging problems involve a combination of these factors rather than just one issue.
Checking Your TV’s Weight and Mount Compatibility
Your TV’s weight is the foundation of this entire problem. Start by finding the exact weight of your television. You can locate this number in the user manual or on the manufacturer’s website. Search for your TV model number online if you don’t have the manual handy.
Next, check your mount arm’s weight capacity. This information appears on the mount’s packaging or instruction manual. The capacity tells you the maximum weight your specific mount can safely hold. Compare these two numbers carefully. If your TV weighs more than the mount’s rated capacity, you have found your main issue.
Pay attention to the weight distribution on the arm. A heavier TV pulls down harder on the motor and gears. The farther the TV extends from the wall, the more strain the mount experiences. This is called leverage, and it multiplies the effect of your TV’s weight on the motor.
Check if you added any accessories to your TV setup. Sound bars, cameras, or other devices mounted near your television add extra weight. Include these items when calculating total weight. Even a few extra pounds can push your mount past its limit.
Verify the mounting pattern matches your TV. Different TVs use different bolt hole patterns. An incorrect pattern creates uneven weight distribution. This causes one side of the arm to sag more than the other.
Document your findings before moving forward. Write down your TV’s weight, the mount’s capacity, and any accessories attached. This information helps you decide whether you need a stronger mount or if internal repairs will solve your sagging problem.
Tools Needed Before You Start the Repair
Before you start any repair work on your motorized TV mount arm, gather the right tools. Having everything ready makes the job faster and safer.
You will need a basic socket wrench set to remove and tighten bolts. These come in various sizes, so a complete set handles most mount hardware. A Phillips and flathead screwdriver are essential for accessing internal components and tightening screws throughout the mount.
Bring a power drill to your workspace. This tool speeds up removing multiple fasteners and helps you reinstall them with proper tension. A drill with adjustable speed settings gives you better control.
A multimeter helps you test the motor’s electrical function. This device measures voltage and current to confirm whether the motor is receiving power correctly.
Grab a level tool to check if your mount sits straight. A sagging arm often indicates the entire mount has shifted out of alignment. A simple bubble level or digital level works well.
Keep a flashlight or headlamp nearby. You will need clear visibility inside the motor housing and behind the mounting plate. Shadows make it hard to spot worn gears or cracks.
Have a measuring tape available to verify dimensions and check for bent components. Measure the distance from the wall to the arm at different points to spot uneven sagging.
Wear safety glasses to protect your eyes from dust and small parts. Work gloves keep your hands clean and protected from sharp edges.
Lay out all tools on a clean workspace before starting. This prevents delays and keeps you organized throughout the repair process.
Step-by-Step Guide to Tightening and Adjusting the Arm
Start by unplugging your motorized mount from the electrical outlet. Safety comes first when working with motorized equipment.
Locate all the bolts connecting the arm to the wall bracket. Use your socket wrench to check each bolt’s tightness. Turn clockwise to tighten. Many sagging issues come from loose fasteners that loosen over months of use.
Check the motor housing bolts next. These bolts hold the motor unit to the arm itself. Tighten them firmly but do not over tighten. Over tightening can strip threads and cause permanent damage.
Inspect the pivot points where the arm connects to the bracket. These joints experience constant stress as the motor moves your TV up and down. Apply your wrench to both sides of each connection. Work in a cross pattern, like tightening car wheel lugs, to ensure even pressure.
Use your level tool to check if the arm sits horizontally. Place the level on top of the arm while it hangs in the middle position. If the bubble shifts to one side, the arm is tilting. This tilt indicates uneven bolt tension or internal damage.
Adjust bolts gradually if tilting occurs. Loosen the high side slightly. Tighten the low side a bit more. Recheck with your level after each adjustment.
Test the motor by plugging it back in. Move the arm up and down slowly through its full range. Listen for grinding sounds or unusual noises. Smooth operation means you have corrected the alignment.
If tightening does not stop the sagging, the problem lies deeper inside the motor or mounting plate. Document your observations before moving to the next repair step. Take photos of bolt positions and any damage you notice. This information helps you identify whether professional service is needed.
Reinforcing the Wall Mount and Motor Assembly
When your motorized TV mount arm sags despite tightening, the wall mount and motor assembly need reinforcement. This section covers practical steps to strengthen these core components.
Start by examining your wall studs. Your wall’s structural integrity determines how well any mount performs. Use a stud finder to locate wooden studs behind your drywall. Mark their positions with a pencil. Most experts recommend mounting into studs that sit 16 inches apart. If your current bolts miss the studs, you need to relocate the mounting bracket.
Next, upgrade your fasteners. Standard bolts may not provide enough support for heavy TVs. Longer anchor bolts distribute weight more effectively across the wall. Replace existing bolts with thicker gauge options if your bracket allows it. Check that new bolts match your bracket’s threading and hole size.
Inspect the mounting plate itself. Look for cracks, bends, or warping in the metal bracket. Even small deformations reduce the plate’s ability to hold weight. If damage exists, the plate requires replacement rather than reinforcement.
Reinforce the motor assembly connection points. The motor housing bolts experience constant stress during arm movement. Tighten these bolts in a cross pattern, similar to tightening car wheel lugs. This ensures even pressure distribution. Apply medium pressure only to avoid stripping threads.
Add a secondary support bracket if possible. Many mounts accept additional bracing components that mount perpendicular to the main arm. This extra support reduces stress on the primary fastening points.
Finally, check your wall’s material. Plaster walls need different fasteners than drywall. Concrete requires masonry anchors. Verify your wall type before selecting reinforcement options.
Test the arm after each reinforcement step to monitor improvement.
Calibrating the Motor to Restore Proper Arm Support
Your motorized TV mount arm needs proper motor calibration to restore support. The motor controls how much force the arm uses to hold your TV in place. When calibration drifts, the arm loses its ability to support weight effectively.
Start by checking your motor’s control panel or remote. Most motorized mounts have a sensitivity or force adjustment setting. This setting tells the motor how hard to work against gravity. If set too low, the motor won’t push back strongly enough.
Locate the adjustment dial or menu option on your control unit. Some mounts use physical dials on the motor housing itself. Others have digital controls you access through a remote or app. Consult your mount’s manual to find the exact location.
Increase the motor’s force setting gradually. Make small adjustments, then test the arm’s movement. Raise and lower the arm several times to feel the difference. The arm should move smoothly without jerking or stalling.
Listen for unusual sounds during calibration. A grinding noise means the motor works too hard. A whining sound suggests the motor strains against resistance. Both indicate you need to fine tune the settings.
Test the arm while holding your TV’s weight manually. Feel how the motor responds to resistance. Adjust again if needed. This process takes patience but works well for many sagging issues.
If your mount has a reset function, use it before calibrating. This clears any incorrect settings from previous use. After reset, recalibrate from the beginning for best results.
Once calibrated properly, your motor should hold the arm steady. The weight support improves noticeably. Regular calibration checks every few months keep your mount working correctly.
Common Mistakes That Worsen Arm Sagging
Many people make simple errors that actually make arm sagging worse. Understanding these mistakes helps you avoid them and fix the problem correctly.
Overtightening bolts is one of the most common errors. People think tighter always means better, but this damages threads and strips the bolt holes. Once threads strip, bolts spin freely and cannot hold anything. The arm sags even more because nothing secures it properly.
Ignoring the wall material is another major mistake. Drywall alone cannot support a heavy motorized mount. Your fasteners need to anchor into wall studs or use special drywall anchors rated for your TV’s weight. Skipping this step means your mount will fail, no matter how tight you make the bolts.
Adjusting only one side of the arm creates uneven pressure. When you tighten just the left bolt or right bolt, the arm tilts and stresses the motor unevenly. Always adjust both sides equally to keep weight distributed properly.
Forgetting to check the mounting plate itself is another mistake. The plate can bend from repeated sagging cycles. A bent plate cannot hold bolts securely, so tightening does nothing. You must inspect it carefully for warping or cracks.
Many people also skip the motor calibration step. The motor has internal force settings that need adjustment for your specific TV weight. Ignoring this means the motor cannot support the arm properly, even with everything physically tight.
Finally, rushing the repair process causes problems. Take time to check each connection point individually. Test after each adjustment. Skipping these steps means you’ll repeat the same mistakes and the sagging returns quickly.
Preventive Maintenance to Avoid Future Sagging
Preventive maintenance stops arm sagging before it starts. You should create a regular inspection schedule to catch problems early. Check your motorized mount every three months or sooner if you use it frequently.
Start by visually inspecting the entire arm assembly. Look for any signs of wear, rust, or loose components. Pay special attention to areas where metal parts connect together. Dust and debris can accumulate in these joints and cause friction issues.
Clean the motor housing regularly to prevent dust buildup. Use a soft cloth to wipe down external surfaces. Avoid spraying water directly on electrical components. A clean motor operates more efficiently and maintains proper tension on the arm.
Lubricate pivot points and joints with appropriate products designed for mechanical equipment. Apply lubricant sparingly to avoid attracting dirt. Move the arm gently through its full range of motion several times after lubrication. This distributes the lubricant evenly throughout the mechanism.
Monitor your TV’s weight against the mount’s specifications. Excess weight accelerates sagging and component wear. If you add heavier equipment, verify that your mount can handle the additional load safely.
Test the arm’s position weekly using your level tool. Small adjustments made early prevent major problems later. Keep track of any changes in how the arm performs or sounds.
Check all fasteners monthly, including wall anchors and bolts. Vibration from daily use can loosen connections gradually. Tighten components gently to maintain proper alignment without damaging threads.
Document your maintenance activities in a simple log. This helps you identify patterns and predict when major service might be needed. Regular preventive care extends your mount’s lifespan significantly and keeps your TV secure.
Final Thoughts
Fixing a sagging motorized TV mount arm takes patience and careful attention. You now have the knowledge to identify weak points and restore proper support. Small fixes often make a big difference in overall stability.
Your TV’s safety depends on a strong, well functioning mount. A sagging arm puts your screen at risk every single day. Taking action early protects your investment and your home.
Remember that every mount system is slightly different. Some arms have unique motor designs or specific weight limits. Always refer to your manual when something seems unclear or unusual.
Safety should guide every decision you make during this process. If a fix feels uncertain, ask for professional help. A wobbly arm can cause serious damage or injury.
Patience matters more than speed here. Rushing through fixes often creates new problems down the road. Take your time with each adjustment and test thoroughly.
Regular checks keep your mount working smoothly for years. A few minutes each month can prevent bigger headaches later. Small habits build long term reliability.
Your effort today saves you stress tomorrow. A stable arm means a stable viewing experience for your whole family. Nobody wants a wobbly screen during movie night.
Trust your instincts when something feels off with the arm. Strange noises, uneven movement, or visible gaps are signs to act quickly. Ignoring these signs only makes problems worse over time.
In the end, a well maintained motorized mount rewards you with smooth, reliable performance. Your screen stays level, secure, and ready for daily use. That peace of mind makes every repair step worthwhile.
Frequently Asked Questions
Why does my motorized TV mount arm sag even after I tighten everything?
Sagging happens because bolts alone cannot fix motor issues. Your motor may have lost calibration over time. Dust buildup inside the motor housing reduces its holding power. The wall anchors might be installed in weak drywall instead of studs. Even tight bolts cannot compensate for a motor that no longer grips properly.
Recalibrate your motor first before assuming bolts need tightening. This step resets the motor’s internal sensors. Then inspect where your mount connects to the wall. Strong anchors in wall studs make a huge difference.
Can I use WD40 or similar products on the motor joints?
No. General purpose lubricants attract dust and create sticky buildup inside motors. This makes sagging worse, not better.
Use only lubricants designed for mechanical equipment and motors. These products repel dust and dry cleanly. Apply sparingly to pivot points and joints only. Avoid spraying near the motor housing itself.
How often should I recalibrate my motorized mount?
Recalibrate every 6 to 12 months for best results. If your arm sags suddenly, recalibrate immediately. Seasonal temperature changes can affect motor performance, so recalibrate when seasons change too.
Check your manual for specific recalibration instructions for your model.
What wall anchors work best for motorized mounts?
Heavy duty anchors designed for motorized equipment outperform standard drywall anchors. Toggle bolts and expansion anchors hold better than plastic anchors.
Install anchors directly into wall studs whenever possible. Studs provide the strongest foundation. If studs are not available, use the heaviest duty anchors your wall can support.

Hi, I’m Rosie Tate — a tech enthusiast, gadget geek, and the creator of RapidConvertLab! 🚀 I’ve spent years exploring the ever-evolving world of electronics, smart devices, and Amazon’s hidden tech treasures. Through my honest, hands-on reviews, I help everyday shoppers cut through the noise and pick gadgets that truly deliver value. When I’m not testing a new device, I’m probably unboxing one! 📦✨