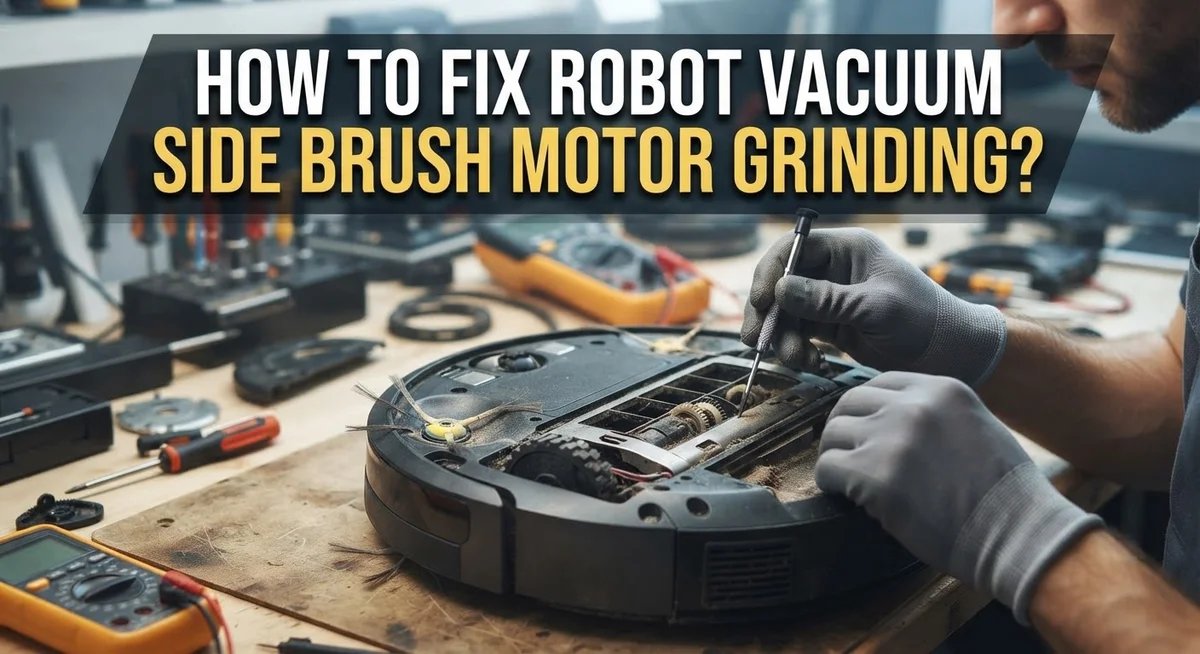
How To Fix Robot Vacuum Side Brush Motor Grinding?
That grinding noise from your robot vacuum is hard to ignore. It sounds harsh and it signals a problem with the side brush motor. Left alone, this issue can damage your vacuum further.
Most of the time, the cause is simple. Hair and debris often wrap around the brush. Sometimes a clogged filter puts extra strain on the motor.
Other times, the brush itself wears out. In rare cases, the motor becomes defective and needs replacement.
In a Nutshell
- Hair and debris wrapped around the brush are the most common culprits. A quick clean often solves the issue right away.
- Always do the hand spin test first. Spin the brush manually and feel for resistance or tightness.
- A clogged filter can strain the motor and cause grinding sounds. Remove it and clean it thoroughly.
- If the brush still feels stuck after cleaning, a bit of WD-40 can help free stuck parts.
- Worn brushes or a defective motor may need full replacement. This happens when cleaning does not fix the grinding.
- To replace parts, remove the dustbin and filter first. Then open the covers to access the motor safely.
- Always secure the brush guard properly after reassembly. A loose guard can cause the same grinding problem again.
- Skipping the spin test or ignoring debris buildup are common mistakes. Avoid these to save time and effort.
What Causes Side Brush Motor Grinding Noises
Hair wrapping around the brush is the most common reason your side brush motor grinds. When hair tangles tightly around the bristles, it forces the motor to work harder. This extra strain creates that grinding sound you hear.
A clogged filter also causes grinding noises. When your filter gets full of dust and debris, airflow decreases. Your motor must push harder to maintain suction. This increased effort produces grinding sounds.
Worn brushes wear down over time from regular use. The bristles become shorter and less effective. As they deteriorate, they may catch or bind inside the motor housing. This binding creates grinding or scraping noises.
A defective motor is another possibility. Motors can fail from age, overuse, or manufacturing defects. When the internal components wear out, grinding sounds often result.
Debris stuck in the brush guard also causes problems. Small objects like string, lint, or pet hair can lodge between the brush and its guard. This blockage prevents smooth rotation and creates friction noises.
Lack of lubrication on moving parts leads to grinding too. The brush axle and motor shaft need smooth operation. When these areas dry out, resistance increases and grinding occurs.
You can identify the cause by performing a simple hand spin test. Manually rotate the brush gently with your fingers. It should spin freely without resistance or noise. If it feels tight or stuck, something is blocking it.
Check the brush closely for wrapped hair. Look at the guard for trapped debris. Inspect the bristles for excessive wear or damage. Clean the filter and surrounding areas thoroughly.
If the brush still won’t spin smoothly after cleaning, the motor may be defective. A motor that resists hand spinning indicates internal damage. In this case, replacement becomes necessary to restore normal operation.
How To Diagnose The Source Of The Grinding Sound
Start by listening to your vacuum carefully. A grinding noise tells you something is wrong, but you need to find out what. The source could be the motor itself, the brush, or something blocking the mechanism.
The hand spin test is your first step. Turn off your vacuum and flip it over. Grab the side brush gently and try to rotate it by hand. It should move freely without much resistance. If it feels tight, stuck, or makes grinding sounds when you spin it, you’ve found your problem area.
Next, inspect the brush closely for hair and debris. Look around the entire brush, especially where it connects to the motor housing. Hair often wraps tightly around the brush shaft and prevents smooth rotation. You may need a small brush or cloth to clean away buildup.
Check the brush guard next. This plastic piece holds the brush in place. Make sure it sits securely and isn’t cracked or bent. A loose guard can cause vibration and grinding noises.
Remove your vacuum’s filter and inspect it. A clogged filter makes the motor work harder, which can cause grinding sounds throughout the unit. Hold the filter up to light. If you can’t see light passing through, it needs cleaning or replacement.
Pay attention to where the noise comes from. Does it happen only when the brush spins? Does it occur during the entire cleaning cycle? This information helps you narrow down whether the problem is the brush motor specifically or something else in the vacuum.
Once you’ve completed these checks, you’ll know if the issue is debris, a worn brush, a loose guard, or a motor that needs replacement. This diagnosis guides your next steps toward a complete fix.
Step-By-Step Guide To Cleaning The Brush And Motor Housing
Start by unplugging your robot vacuum completely. Safety comes first when working with any electrical device. Locate the side brush motor housing on the bottom of your vacuum. Most models have a simple cover or panel you can remove by hand or with a basic screwdriver.
Remove the dustbin and filter next. A clogged filter increases motor strain, so clean it thoroughly under running water. Let it dry completely before reinstalling. This simple step often reduces grinding sounds significantly.
Now focus on the brush itself. Gently pull out the side brush from its socket. Inspect the entire brush for hair, string, and debris wrapped tightly around it. Use your fingers or tweezers to remove any tangled material. Pay special attention to the base where the brush connects to the motor shaft.
Wipe down the motor housing with a dry cloth. Dust and debris accumulate inside this area and cause friction. Make sure you reach into corners and crevices. A small brush or old toothbrush works well for tight spaces.
Perform the hand spin test before reassembling. Hold the brush shaft gently and rotate it by hand. It should move smoothly without resistance or grinding sensations. If it feels tight or stuck, apply a small amount of lubricant to free stuck components. Spin it again until movement feels fluid.
Reinstall the brush firmly into its socket. Make sure the brush guard sits securely in place. A loose guard causes vibration and grinding sounds. Double check that everything is tight before reattaching the bottom cover.
Reinstall your clean filter and dustbin. Plug the vacuum back in and test the side brush. Listen carefully for any remaining grinding. Most grinding issues disappear after thorough cleaning and proper reassembly.
How To Disassemble And Replace A Worn Or Defective Motor
Disassembling your robot vacuum requires patience and attention to detail. Start by unplugging the device completely from power. This keeps you safe while working with internal components.
Remove the dustbin and filter first. Most models have a release button or clip that lets you pull these out easily. Set them aside in a clean area so you don’t lose small parts.
Next, flip your vacuum upside down to access the bottom panel. Look for screws holding the cover in place. Use the correct screwdriver size to avoid stripping the screw heads. Take a photo of the screw locations before removing them. This helps you remember where each one goes during reassembly.
Once the bottom cover comes off, you’ll see the side brush motor assembly. The motor typically connects to the brush shaft with a small connector or clip. Gently disconnect this by pulling straight out. Don’t twist or force it, as this damages the connection.
Some models also require removing the top cover or front bumper to access the motor fully. Check your vacuum’s manual for the exact steps. Remove screws carefully and set them in a small container to keep them organized.
Inspect the motor housing for hair, dust, and debris buildup. Use a dry cloth to wipe away loose particles. A soft brush works well for stubborn debris in tight spaces.
When replacing a defective motor, simply reverse the removal process. Insert the new motor connector firmly into place until it clicks. Make sure the brush spins freely by hand before reassembling everything.
Reinstall all covers and screws in reverse order. Double check that the brush guard sits securely. Reconnect your filter and dustbin last. Power on your vacuum and listen for smooth operation without grinding sounds.
Tips For Preventing Future Motor Grinding Issues
Regular maintenance stops grinding problems before they start. The best approach is to clean your robot vacuum’s side brush every two weeks, even if you don’t hear noise yet. This simple habit removes hair and dust before they cause motor strain.
Check your vacuum’s filter monthly. A clogged filter forces the motor to work harder and can damage the side brush motor. Replace or clean your filter according to your vacuum’s manual. Clean filters mean less strain on all moving parts.
Inspect the brush guard regularly for loose screws or damage. A secure guard prevents debris from reaching the motor. Tighten any loose fasteners you find. A tight guard also stops hair from wrapping around the brush shaft.
Empty your dustbin after every cleaning cycle. A full bin increases pressure on the motor and surrounding components. This simple step protects your vacuum’s longevity.
Keep your vacuum’s wheels and sensors clean too. Debris buildup anywhere on your vacuum makes motors work harder. When one motor strains, it can affect others.
Store your robot vacuum in a dry place. Moisture and humidity can cause rust on metal motor parts. This leads to grinding and resistance. A clean, dry storage area extends motor life significantly.
Run your vacuum on appropriate surfaces for your model. Thick carpets or uneven floors cause motors to overwork. Check your manual for recommended floor types.
Perform the hand spin test monthly. Manually rotate the side brush gently. It should move freely without resistance. If you feel tightness, clean immediately. Catching problems early prevents expensive repairs.
Follow your manufacturer’s maintenance schedule. Different models have specific care requirements. Your manual lists exactly what needs attention and when. Sticking to this schedule keeps your motor grinding free for years.
Common Mistakes To Avoid During Repair
Many people make costly mistakes when trying to fix their robot vacuum’s side brush motor grinding. These errors can turn a simple repair into a bigger problem.
The most common mistake is skipping the hand spin test. You must manually rotate the brush by hand before you take anything apart. If it doesn’t spin freely, the motor needs replacement. Many people ignore this step and waste time cleaning when the real issue is a defective motor.
Another frequent error is failing to secure the brush guard properly after reinstall. The brush guard holds everything in place. If you don’t tighten it completely, the brush will wobble and grind again. Always double check that all screws are tight before you reassemble the vacuum.
People often forget to clean debris before reassembly too. Hair and dust trapped around the motor will cause grinding to return quickly. Take time to wipe down the entire motor housing with a dry cloth. Remove every bit of buildup you find.
Not cleaning the filter is another mistake that increases motor strain. A clogged filter makes the motor work harder and can cause grinding sounds. Always inspect and clean your filter when you open up the vacuum.
Some people also rush the disassembly process. Take photos as you remove each cover and part. This helps you remember where everything goes. Rushing leads to missing screws or installing covers incorrectly.
Finally, avoid using excessive force when removing parts. If something won’t come loose, stop and check if you missed a screw. Forcing components can break clips and damage the housing.
These mistakes are preventable. Work slowly, follow each step carefully, and test your brush movement before reassembly. Your vacuum will run quietly again without unnecessary damage.
Troubleshooting When The Grinding Noise Persists
When the grinding noise continues even after basic cleaning, you need a different approach. The problem likely runs deeper than surface debris.
Start by performing the hand spin test again, but this time be thorough. Remove the side brush completely from your vacuum. Hold the brush shaft and try to rotate it by hand. If it won’t spin freely or feels tight, the motor itself is damaged. This test tells you whether cleaning will help or if replacement is necessary.
Check the brush guard mounting next. Flip your vacuum upside down and inspect where the guard connects to the motor assembly. Look for loose screws or cracks in the plastic. A damaged guard can cause vibration that sounds like grinding. Tighten all visible screws with the appropriate tool.
Examine the motor shaft for visible damage. Hair can wrap so tightly that it cuts into the metal. Debris can also lodge in the motor housing. Use a small brush or compressed air to clean inside the motor area carefully. Don’t force anything or you’ll cause more damage.
If the brush still grinds after these steps, the motor bearings are likely worn out. Bearings wear down over time and create friction sounds. Once bearings fail, they cannot be repaired through cleaning alone.
Document what you find before moving forward. Take photos of the motor assembly, any debris you remove, and the brush condition. This information helps if you need to contact support or order replacement parts.
Test the vacuum briefly after each step. This helps you identify exactly which fix solved the problem. Sometimes multiple issues combine to create the grinding sound. By isolating each problem, you’ll know what needs attention.
If grinding persists after thorough inspection and cleaning, motor replacement is your next step.
Final Thoughts
Grinding noises from your side brush motor don’t have to stay a mystery. Most causes are simple to find and fix.
Hair tangles and debris buildup cause most grinding sounds. A quick cleaning solves this problem in minutes.
Sometimes the issue runs deeper. Worn brushes or damaged motors need replacement parts to fix properly.
The hand spin test remains your best diagnostic tool. Always check this first before assuming the worst.
If the brush spins freely after cleaning, you likely solved the problem. Grinding that continues points to motor damage.
Remember to secure the brush guard tightly during reassembly. This small step prevents future grinding issues from returning.
Regular maintenance keeps your robot vacuum running smoothly. Clean filters and brushes stop most problems before they start.
Don’t ignore early warning signs. Small grinding sounds often signal issues that get worse over time.
Acting quickly saves you money and hassle. A simple cleaning today beats a full motor replacement tomorrow.
Trust your diagnostic skills here. You now know the signs, causes, and fixes for this common problem.
Most robot vacuum owners can handle this repair themselves. The steps are straightforward and don’t require special tools.
Keep your vacuum’s manual nearby for model specific details. Different brands have slightly different disassembly steps.
With proper care, your robot vacuum will run quietly again. Regular checks keep grinding noises away for good.
Take action as soon as you notice unusual sounds. Early intervention always leads to easier, cheaper fixes.
Your robot vacuum deserves proper care and attention. Following these steps keeps it working well for years to come.
Frequently Asked Questions
What does a grinding side brush motor sound like?
A grinding side brush motor produces a rough, scraping noise. The sound differs from normal operation. You’ll hear something like metal rubbing against metal or gravel tumbling inside the vacuum. The noise gets louder as the motor works harder. If you hear grinding, stop using the vacuum immediately to prevent further damage.
How do I know if my side brush motor is actually broken?
Perform the hand spin test first. Turn off your vacuum and manually rotate the side brush with your finger. It should spin freely without any resistance. If the brush feels tight or stuck, the motor has a problem. A healthy brush spins smoothly like a wheel on a bicycle. Tightness indicates wear or debris blocking the motor shaft.
Can I fix the grinding noise myself?
Yes, most grinding issues are fixable at home. Start by removing hair and debris wrapped around the brush. Clean the brush guard and surrounding area thoroughly. Check that the guard sits securely after cleaning. Apply a small amount of lubricant to free stuck components if needed. If the brush still won’t spin freely by hand after these steps, the motor needs replacement.
When should I replace the motor instead of cleaning?
Replace the motor when cleaning doesn’t solve the problem. If the brush remains tight after you’ve removed all visible debris and hair, the motor bearings are likely damaged. A defective motor won’t spin freely no matter how much you clean. Motor replacement becomes necessary at this point. Contact the vacuum manufacturer for replacement parts specific to your model.

Hi, I’m Rosie Tate — a tech enthusiast, gadget geek, and the creator of RapidConvertLab! 🚀 I’ve spent years exploring the ever-evolving world of electronics, smart devices, and Amazon’s hidden tech treasures. Through my honest, hands-on reviews, I help everyday shoppers cut through the noise and pick gadgets that truly deliver value. When I’m not testing a new device, I’m probably unboxing one! 📦✨