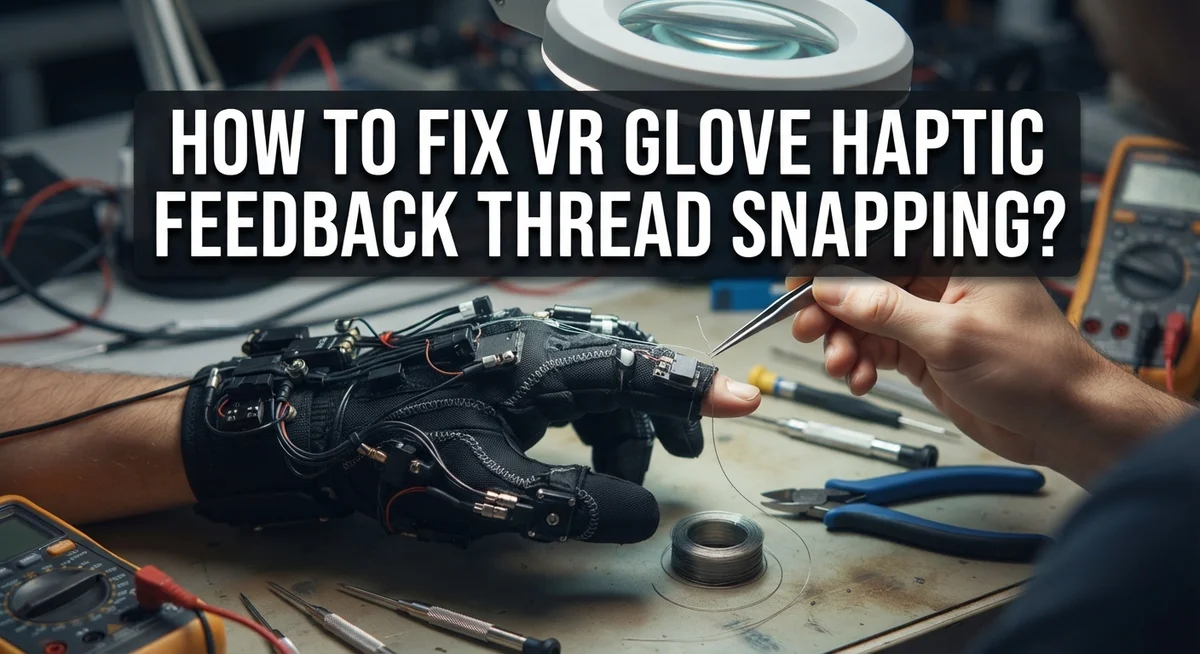
How To Fix VR Glove Haptic Feedback Thread Snapping?
Your VR glove feels a little off. Maybe a finger does not respond right. You check closely and find a snapped haptic feedback thread inside the glove.
This is a common problem for VR glove users. The tiny threads that power haptic feedback can wear out. They snap after heavy use or rough handling.
Do not panic. This issue is fixable at home in most cases.
This guide walks you through the whole process. You will learn how to spot a snapped thread quickly. We cover the tools you need before you start.
In a Nutshell
- Turn off and unplug your glove before you start any repair work. This step keeps you safe and protects the internal circuits from damage.
- Locate the snapped thread by gently checking each finger segment. Most breaks happen near joints where fingers bend often.
- Open the glove casing carefully using small tools made for electronics. Rushing this step often causes more harm than the original snap.
- Reconnect or replace the thread using conductive thread or a small repair kit. Make sure the connection sits snug against the actuator.
- Test the actuator contact after your fix. Proper contact directly affects how well you feel textures and pressure in games.
- Calibrate your glove through your headset menu once repairs finish. Good calibration improves accuracy during real tasks and virtual play.
- Pair your glove again with your headset to confirm everything works. A smooth pairing process means your repair succeeded.
Understanding Haptic Feedback Threads and Their Role in VR Gloves
Haptic feedback threads are tiny conductive pathways inside your VR gloves. They carry electrical signals from the main controller to the actuators in each finger segment. These threads make the vibrations and pressure sensations you feel when grabbing virtual objects.
The actuators need constant electrical connection to work properly. When a thread snaps, the signal stops flowing. Your glove loses feedback in that specific finger or area. This breaks the immersion and makes VR interactions feel incomplete.
Each finger typically has multiple thread connections. Some threads handle power delivery. Others manage signal communication between the main board and individual actuators. A single break interrupts the entire feedback chain for that section.
Thread snapping happens due to normal wear and tear. Your gloves flex and bend thousands of times during gameplay. The threads inside experience stress with every movement. Over time, this repeated flexing causes tiny breaks in the conductive material.
Moisture and temperature changes also weaken threads. Sweat from extended gaming sessions creates corrosion. Temperature fluctuations cause the materials to expand and contract at different rates. This physical stress eventually leads to breaks.
Understanding thread function helps you diagnose problems faster. If one finger has no feedback but others work fine, you likely have a localized thread break. If multiple fingers lose feedback at once, the main power thread may be damaged.
Knowing where threads run inside your glove matters for repairs. Most gloves have threads running along the palm side toward each finger. Some models route threads through the wrist area. Checking your specific glove design helps you locate breaks more efficiently during repairs.
Common Causes of Thread Snapping in VR Glove Haptics
VR glove haptic threads snap for several clear reasons. Understanding these causes helps you prevent future damage and fix current problems effectively.
Repeated flexing and bending is the main culprit. Your gloves bend thousands of times during gameplay. Each bend puts stress on the tiny threads running through your fingers. Over months of use, this constant movement weakens the conductive pathways until they break.
Moisture damage accelerates thread failure significantly. Sweat from your hands seeps into the glove casing over time. Water exposure corrodes the metal threads and breaks electrical connections. High humidity environments make this problem worse.
Temperature changes also harm your threads. Extreme heat and cold make materials expand and contract. This expansion and contraction creates tiny cracks in the conductive threads. Rapid temperature shifts cause the most damage.
Poor handling during storage contributes to snapping too. Storing gloves in tight spaces or folded positions puts unnecessary strain on internal components. Threads get pinched and stressed when your glove sits in cramped conditions.
Manufacturing defects occasionally cause threads to snap prematurely. Some gloves leave the factory with weak threads already present. These fail faster than normal even with gentle use.
Incorrect calibration can also stress threads excessively. When actuators press too hard against your skin, they pull on internal connections. This tension eventually breaks the delicate pathways.
Impact and drops create sudden thread breaks instantly. Dropping your glove or hitting it against hard surfaces can snap threads immediately. Even small impacts damage the fragile internal wiring.
Knowing these causes helps you use your gloves more carefully and recognize when professional repair becomes necessary.
Signs Your Glove’s Haptic Threads Are Damaged or Snapping
Your VR glove’s haptic feedback relies on tiny threads that carry electrical signals. When these threads snap, you’ll notice clear warning signs before complete failure occurs.
Weak or inconsistent feedback is the first sign something’s wrong. Your fingers might feel vibrations in some areas but not others. The sensation becomes spotty rather than smooth across your hand.
Dead zones appear on specific fingers. One finger gets full haptic response while another feels nothing at all. This pattern tells you a thread has broken in that particular segment.
You might experience delayed feedback responses. Instead of instant vibration when you touch a virtual object, there’s a noticeable lag. The signal struggles to reach the actuator because the thread connection is damaged.
Intermittent vibrations come and go unpredictably. Your glove works fine one moment, then stops the next. This on and off pattern indicates a loose or partially snapped thread.
Unusual buzzing or stuttering sensations replace normal haptic feedback. Rather than smooth vibrations, you feel rapid pulsing or strange patterns. This happens when electrical current jumps across a broken connection.
Pay attention to burning smells near your fingers. This serious warning sign means electrical current is arcing across the damaged thread. Stop using your glove immediately if you notice this.
Visual inspection helps too. Look for discoloration or scorch marks on your glove’s exterior. These marks often align with where internal threads have failed.
Test each finger individually through your headset’s haptic menu. Press virtual objects and note which fingers respond poorly. This systematic check pinpoints exactly where damage exists, making repairs easier and faster for you.
Step-by-Step Guide to Diagnosing Thread Snapping Issues
Start by powering on your VR gloves and putting on your headset. Navigate to your device’s haptic settings menu. This is where you’ll run diagnostic tests on each finger independently.
Test each finger one at a time. Press the test button for your thumb first. You should feel a clear vibration pattern. If nothing happens, that finger likely has a broken thread. Move through your index, middle, ring, and pinky fingers the same way.
Pay close attention to the quality of feedback you receive. Strong vibrations mean threads are intact. Weak or fading vibrations suggest thread damage is starting. Completely absent feedback indicates a snapped thread.
Next, flex your glove gently while running tests. Move your fingers slowly through different positions. Threads sometimes snap only when your hand bends certain ways. If feedback disappears during specific movements, you’ve found the problem area.
Check for visual damage on the glove surface. Look along the palm side and between fingers. Small tears or worn spots often hide thread problems underneath. Gently press these areas while testing haptic feedback.
Document which fingers fail the test. Write down whether feedback is completely gone or just weak. Note if problems happen during certain hand positions. This information helps you understand the damage severity.
Temperature can affect results temporarily. Let your gloves sit at room temperature for 15 minutes before testing. Cold gloves sometimes show false failures.
If multiple fingers show problems, thread damage is widespread. Single finger failures usually mean one specific thread snapped. This diagnostic process takes about 10 minutes and tells you exactly what’s broken.
How To Repair or Replace Snapped Haptic Threads Safely
Repairing or replacing snapped haptic threads requires careful handling to avoid further damage. Start by powering off your gloves completely and removing the battery if possible. This prevents electrical shocks during the repair process.
Assess the damage first. Use a magnifying glass to locate the exact position of the snapped thread. Most threads run along the palm side and between finger segments. Take clear photos for reference if you plan to seek professional help later.
For minor thread snaps near the edges, you can attempt a careful repair. Gently separate the glove layers where the thread broke. Use tweezers to access the damaged area safely. Never force the layers apart, as this causes additional damage.
Clean the broken ends with a soft, dry cloth. Remove any dust or debris around the snapped thread. This improves visibility and prevents contamination during repair.
If the thread shows signs of burning or discoloration, replacement is safer than repair. Attempting to fix severely damaged threads can create electrical hazards. Professional repair services handle these cases better than DIY methods.
For thread replacement, you need specialized conductive thread designed for haptic systems. Standard sewing thread won’t work. Carefully thread the new material through the existing channels. Ensure connections are secure at both ends where the thread attaches to actuators.
Test gently after repairs. Power on your gloves and run individual finger tests through your headset menu. Start with low intensity settings. Increase gradually while monitoring for unusual sensations or burning smells.
If DIY repair fails or seems risky, contact the manufacturer’s support team. They provide guidance on professional repair options. Some glove models have warranty coverage for thread damage from normal use.
Recalibrating Haptic Feedback After a Repair
After you repair or replace snapped haptic threads, your VR gloves need proper recalibration. This process ensures the feedback works correctly and matches your headset’s expectations.
Start by powering on your gloves completely. Wait about 30 seconds for the internal systems to initialize fully. Then put on your VR headset and navigate to the settings menu. Look for the haptic feedback or controller settings section.
Most headsets let you access a calibration tool directly. Select the option to recalibrate haptic devices or controllers. Your gloves should appear in the available devices list. Choose each glove individually to recalibrate them one at a time.
The calibration process typically asks you to perform specific hand movements. You might need to make a fist, spread your fingers, or rotate your wrist. Follow the on screen instructions carefully. These movements help your headset detect the repaired threads and establish proper signal strength.
During calibration, pay close attention to feedback intensity. The vibrations should feel consistent across all fingers. If one finger feels weaker than others, the recalibration may need to repeat. Most systems allow you to restart the process without issues.
After calibration completes, test each finger individually. Pinch virtual objects, press buttons, and grab items in your VR environment. Verify that sensations feel natural and responsive. Delayed or missing feedback means recalibration didn’t fully succeed.
If problems persist after recalibration, try these steps again. Sometimes a second or third attempt resolves stubborn issues. Your gloves should now deliver smooth, consistent haptic feedback across all fingers and hand positions.
Preventive Maintenance Tips to Avoid Future Thread Snapping
Preventing thread snapping starts with understanding what causes the damage. Excessive pulling forces and repetitive stress are the main culprits. Your haptic gloves experience constant tension during gameplay, so reducing strain is essential.
First, store your gloves properly when not in use. Keep them in a cool, dry place away from direct sunlight. Extreme heat can weaken the conductive threads over time. Never leave your gloves crumpled or twisted in a bag.
Second, handle your gloves gently during gameplay. Avoid jerking your hands suddenly or applying sudden force against virtual objects. Smooth, controlled movements reduce stress on internal threads. Think of your gloves like delicate instruments rather than tough gaming gear.
Third, clean your gloves regularly with a soft, dry cloth. Dust and moisture can accumulate around thread connections and cause friction damage. Wipe the exterior surface and finger areas where threads are most exposed.
Fourth, check your glove fit carefully. Gloves that are too tight create constant pressure on threads. Gloves that are too loose allow internal components to shift and rub together. A proper fit keeps everything stable during use.
Fifth, limit your session length initially. Start with shorter gaming periods and gradually increase as your gloves break in properly. This gradual approach prevents premature wear on threads.
Finally, avoid exposing your gloves to moisture or sweat buildup. If you sweat during gameplay, take breaks and let your gloves dry. Moisture degrades conductive threads and causes electrical failures.
These simple steps significantly reduce thread snapping incidents. Consistent care keeps your haptic feedback system working smoothly for longer periods.
Troubleshooting Persistent Haptic Feedback Problems
When haptic feedback problems continue after initial troubleshooting, you need a systematic approach to identify the root cause. Start by testing each finger individually through your headset’s diagnostic menu. This reveals whether the issue affects one finger or multiple fingers across your glove.
Check your glove’s fit first. Loose or tight gloves create inconsistent actuator contact with your skin. Adjust the straps and velcro carefully. Poor fit reduces feedback quality significantly and mimics thread damage symptoms.
Examine the glove surface for visible damage. Look for discoloration, burn marks, or fraying around the finger areas. Use a magnifying glass to spot small issues. Thread snapping often leaves visible traces near the actuator zones.
Test your gloves on a different headset if possible. Sometimes the problem stems from your headset’s pairing connection, not the gloves themselves. Unpair and re-pair your gloves through the headset menu. Wait 30 seconds between disconnecting and reconnecting.
Clean your gloves thoroughly with a soft, dry cloth. Sweat and moisture accumulation can interfere with electrical connections. Pay special attention to the finger regions where actuators sit.
If one finger shows no feedback but others work fine, thread damage is likely localized to that area. If multiple fingers fail simultaneously, the problem may involve your glove’s main power connection instead.
Temperature matters too. Cold environments sometimes reduce haptic intensity temporarily. Allow your gloves to warm to room temperature before concluding there’s permanent damage. This simple step resolves many false alarms about persistent problems.
Final Thoughts
Fixing snapped haptic threads in your VR gloves does not need to feel overwhelming. With the right tools and patience, you can restore full feedback function yourself.
Small repairs make a big difference. A tiny thread fix can bring your gloves back to life instead of sitting unused in a drawer.
Remember that prevention beats repair every time. Store your gloves properly and handle them with care to avoid future snapping.
Calibration after any repair is just as important as the fix itself. Skipping this step often leads to inconsistent feedback, even when threads are properly reconnected.
Test each finger individually after every repair session. This simple habit helps you catch problems early before they become bigger issues.
If your gloves continue showing weak or missing feedback, do not panic. Persistent issues usually point to a specific finger or area, not total glove failure.
Patience matters throughout this process. Rushing repairs often causes more damage than the original snap itself.
Your gloves represent an investment in better virtual experiences. Taking time to maintain them properly extends their life significantly.
Many users find that basic thread repairs are simpler than expected once they understand glove construction. The actuators and sensors inside are more resilient than they appear.
Community forums and support channels offer helpful guidance when you face unusual problems. Other users often share solutions for the exact issue you are experiencing.
Your effort in fixing these gloves pays off through smoother, more immersive VR sessions. Realistic haptic feedback makes every virtual interaction feel natural again.
Keep testing, keep cleaning, and keep calibrating regularly. These small habits keep your VR gloves working well for a long time.
Frequently Asked Questions
What causes haptic threads to snap in the first place?
Haptic threads snap when the internal wiring inside your gloves experiences too much stress. This happens during intense gameplay, rough handling, or when you bend your fingers at extreme angles. Moisture and sweat buildup also weakens the thread material over time. Sudden impacts or accidental drops accelerate the damage significantly.
Can I use my gloves with one broken thread?
Yes, you can still use them, but the feedback quality drops noticeably. A snapped thread means that specific finger loses sensation or produces weak vibrations. You’ll notice the difference immediately during gameplay. The glove becomes less useful for precise interactions in virtual environments.
How do I know if a thread is actually snapped versus loose?
A loose thread usually produces intermittent feedback. You might feel vibrations one moment and nothing the next. A snapped thread shows consistent, complete silence from that finger. Visual inspection helps too. Open the glove carefully and look for frayed wires or broken connections inside the actuator housing.
Should I attempt the repair myself or seek professional help?
This depends on your comfort level with electronics. Simple thread reattachment is manageable for most people with basic tools. However, complex internal repairs require specialized knowledge. If you’re unsure about opening your gloves, professional repair services exist. Attempting repairs without proper knowledge can cause permanent damage.
How long does a thread repair typically last?
A properly executed repair usually lasts as long as the original thread did. Quality matters significantly here. Reinforced repairs sometimes outlast stock threads because you use stronger materials. Your repair longevity depends on how carefully you handle the gloves afterward.

Hi, I’m Rosie Tate — a tech enthusiast, gadget geek, and the creator of RapidConvertLab! 🚀 I’ve spent years exploring the ever-evolving world of electronics, smart devices, and Amazon’s hidden tech treasures. Through my honest, hands-on reviews, I help everyday shoppers cut through the noise and pick gadgets that truly deliver value. When I’m not testing a new device, I’m probably unboxing one! 📦✨