How To Fix VR Controller Battery Sled Contact Spring Bending?
Does your VR controller keep losing power even with fresh batteries? The problem might not be the battery at all. It could be a bent contact spring inside the battery sled.
This tiny spring plays a big role. It connects your battery to the controller’s motherboard. When it bends or gets stuck, your controller loses power or disconnects randomly.
This issue is common in Meta Quest 2 controllers. Many users notice flickering connections or total power loss. The good news? You can fix this at home with simple tools.
In a Nutshell
- Open the compartment carefully. Remove the three screws holding the battery sled in place. Take your time with this step.
- Disconnect the ribbon cable first. This protects the motherboard from damage during repair. Skipping this step often leads to bigger problems.
- Check for corrosion. Look through the ribbon cable slot before you touch the spring. Corrosion can cause the same symptoms as a bent spring.
- Use isopropyl alcohol on the stuck contact. A drop of 93% IPA helps loosen grime without harming parts. Let it sit for a moment before testing movement.
- Try the foil trick if needed. A small ball of crumpled aluminum foil can free a jammed spring. Gently press the contact afterward to test its bounce.
- Test before closing everything up. Insert a battery and check the connection. If it works smoothly, your controller is ready to go again.
Understanding the Battery Sled Contact Spring Issue
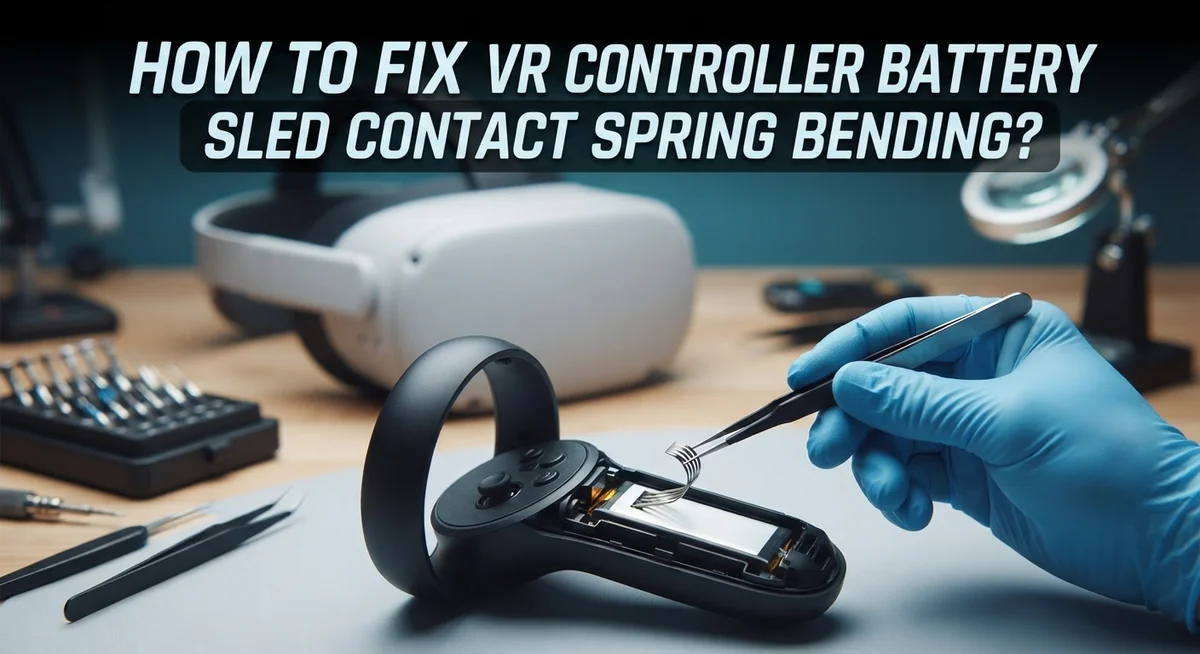
The battery sled contact spring is a small metal component inside your VR controller that holds the battery firmly in place. When this spring bends or gets stuck, your controller loses power even though the battery is brand new and fully charged.
Why this happens is important to understand. Moisture, dust, and corrosion build up inside the battery compartment over time. The spring can also bend from repeated battery insertions and removals. Once bent, the spring no longer makes solid contact with the battery terminals. This breaks the electrical connection your controller needs to function.
How you’ll know it’s the problem is fairly straightforward. Your controller powers on and off randomly. The battery drains quickly even when freshly installed. Sometimes the controller only works when you press or jiggle it. These signs point directly to a contact spring issue rather than a dead battery.
The good news is that this problem is fixable at home. You don’t need special tools or technical skills. Most people can complete this repair in under 30 minutes. The process involves opening the battery compartment, accessing the spring mechanism, and either unsticking or reshaping the bent contact.
Common causes include leaving dead batteries inside the controller, exposing it to humidity, and dropping the device. Pet hair and dust also accumulate in the compartment and interfere with spring movement.
Understanding this issue helps you prevent future problems. Regular battery removal and compartment cleaning can keep your controller working smoothly. If you catch corrosion early, you can stop the spring from bending in the first place.
Signs Your Controller Has a Bent or Stuck Contact Spring
Your VR controller might be failing to charge or power on even with fresh batteries inside. The culprit is often a bent or stuck contact spring in the battery compartment. Learning to spot these signs early helps you fix the problem before it gets worse.
Look for these warning signs first. Your controller turns on and off randomly during use. The battery connection feels loose when you insert a fresh battery. The device powers down even though the battery has charge left. These symptoms point directly to a contact spring issue.
Check the physical signs next. Open your battery compartment and look inside carefully. You might see the metal contact spring sitting at an odd angle instead of standing upright. The spring could appear bent, twisted, or pushed to one side. Sometimes it looks fine but feels stuck when you try to move it gently with your finger.
Listen for clues too. When you insert a battery, does it click into place normally? A healthy connection produces a clear clicking sound. If you hear nothing or just a dull thud, the spring isn’t making proper contact.
Test the connection directly. Insert a battery and wiggle it slightly. A working spring holds the battery tight with no movement. A bent spring lets the battery shift around inside the compartment. This movement breaks the electrical connection.
Corrosion is another indicator. Look through the ribbon cable slot at the spring. White, green, or blue crusty buildup means corrosion is present. This buildup prevents the spring from moving freely and making contact with your battery.
Tools and Materials You’ll Need
Before you start fixing your VR controller battery sled contact spring, gather the right tools and materials. Having everything ready prevents frustration and keeps you from damaging delicate components.
You’ll need a small Phillips head screwdriver to remove the three screws holding your battery compartment together. Make sure it fits snugly into each screw head so you don’t strip them. A plastic spoon or soft plastic tool works great for gently prying open the battery cover without scratching your controller.
Isopropyl alcohol at 93% concentration is essential for cleaning stuck contacts. This solution evaporates quickly and won’t harm electronic components inside your controller. Grab a small brush with soft bristles, like an old toothbrush, to apply the alcohol gently to corroded areas.
You’ll want a clean, lint free cloth or paper towels nearby. These help you dry surfaces after applying alcohol and keep dust away from internal components.
A small ball of crumpled aluminum foil serves as a useful tool if your spring is jammed. The foil can help dislodge stuck springs without applying direct force that might cause damage.
A battery in good condition helps you test your repair work. Use a battery you know works properly so you can verify the connection after your fix.
Work in a well lit area with a magnifying glass or phone flashlight to see small details inside the compartment. Good lighting prevents mistakes and helps you spot corrosion you might otherwise miss.
Finally, keep a small container nearby to hold the screws you remove. Losing these tiny screws is easy, and having them organized keeps your repair moving forward smoothly.
Step-by-Step Guide to Disassembling the Battery Compartment
Start by placing your VR controller on a clean, flat surface with good lighting. Make sure you have your small Phillips head screwdriver ready and all materials within arm’s reach.
Locate the battery compartment on the back of your controller. You’ll see three screws holding the compartment cover in place. Remove these screws slowly and set them in a safe spot where they won’t roll away. Keep them organized so you remember which screw goes where.
Gently lift the battery compartment cover away from the controller. Don’t force it if it feels stuck. Let it sit for a moment, then try again with light pressure.
Now you’ll see the ribbon cable connected to the motherboard. This is the most delicate part of your disassembly. Carefully disconnect this ribbon cable by gently pulling the connector away from the motherboard. Move slowly and deliberately to avoid damaging the connection points.
With the ribbon cable disconnected, you now have clear access to the battery sled and contact spring mechanism. Take a moment to examine the spring closely. Look for any visible bending, corrosion, or debris stuck to the metal surfaces.
Before touching anything, take a photo with your phone. This helps you remember exactly how everything looked originally, which makes reassembly much easier later.
Don’t proceed further without disconnecting the ribbon cable first. This step protects the electronic components from accidental damage during your repair work.
You’re now ready to address the bent or stuck contact spring. The compartment is fully accessible, and you can safely work on freeing or reshaping the spring mechanism without risking damage to other controller components.
How to Unstick and Reshape the Contact Spring
When your battery contact spring sticks or bends, you need to unstick it first before reshaping. The spring often gets trapped by corrosion or debris, so cleaning comes before any physical adjustments.
Start by applying 93% isopropyl alcohol directly onto the stuck contact spring. This solution cleans away corrosion without harming your controller’s electronic components. Let the alcohol sit for about 30 seconds to break down stuck particles and oxidation buildup.
Next, take a small ball made from crumpled aluminum foil. Gently jam this foil ball into the battery compartment to help free the spring from its stuck position. The foil creates gentle pressure that dislodges debris without forcing anything or causing damage.
After using the foil, carefully push on the contact spring with a plastic tool or wooden stick. Never use metal objects that could scratch or damage the delicate components inside. Push gently and repeatedly until the spring starts moving freely again.
Wipe away any remaining alcohol or debris with a clean, lint free cloth. Let the compartment air dry completely before reassembling anything.
Once the spring moves smoothly, you can begin reshaping it. The contact should sit at a slight angle to grip the battery properly. If it’s still bent, use gentle pressure to guide it back to its original position.
Test the spring movement several times by hand before closing the compartment. It should move up and down without resistance or sticking. This ensures your battery will make proper contact when you insert it.
Reassembling the Controller and Testing Battery Connectivity
Now that you’ve freed and reshaped your contact spring, it’s time to put everything back together. This step matters because improper reassembly can undo all your repair work.
Start by checking the spring one more time. Make sure it moves freely and sits in its correct position inside the battery compartment. The spring should not touch the sides of the compartment or stick to any surface.
Next, reconnect the ribbon cable to the motherboard. Align it carefully with the connector slot. Push it down gently until you hear or feel a small click. Don’t force it. The connection should feel snug but not tight.
Place the battery compartment cover back onto your controller. Line up the three screw holes before you start turning screws. Insert each screw slowly and turn it clockwise until snug. Don’t overtighten because you can crack the plastic housing.
Now comes the testing phase. Insert a fresh battery into the compartment. The battery should slide in smoothly without resistance. Close the battery door completely.
Power on your controller and check for response. The light should turn on and stay on. Hold down buttons and test the joystick to ensure everything works. The controller should connect to your headset within seconds.
If the controller still doesn’t respond, remove the battery and inspect the spring again. Sometimes a spring needs a second adjustment. Check for any remaining corrosion on the ribbon cable connector. Wipe it with a small amount of isopropyl alcohol if needed.
Successful reassembly means your controller battery connection is restored and your device works like new again.
Common Mistakes to Avoid During the Repair
When fixing your VR controller battery sled contact spring, certain mistakes can make things worse. The most common error is forcing components during disassembly. Your controller contains delicate parts that break easily. Push gently and stop if you feel resistance.
Never skip disconnecting the ribbon cable before accessing the battery mechanism. Many people ignore this step to save time. This creates a serious risk of damaging electronic components on the motherboard. Take the extra 30 seconds to do it properly.
Ignoring corrosion is another frequent mistake. Look through the ribbon cable slot for green or white buildup on metal contacts. This corrosion prevents proper electrical connection even after you fix the spring. Clean it away with isopropyl alcohol before reassembling.
Don’t rush the reshaping process. Some people bend the contact spring back too aggressively. This causes the same problem to return within days. Work slowly and test the spring movement multiple times by hand.
Failing to test after repair wastes your effort. Always power on your controller after reassembly to confirm the battery connects. If it still doesn’t work, disassemble again rather than assuming success.
Another mistake involves using metal tools on the contact spring. Metal scratches the spring coating and reduces conductivity. Use plastic or wooden tools instead.
Finally, avoid reassembling while the spring is still sticky or partially stuck. Your battery won’t sit flush in the compartment. This creates loose connections that fail intermittently. Complete the cleaning and reshaping steps fully before putting everything back together. Taking time prevents repeat failures and keeps your controller working reliably.
Troubleshooting Persistent Connectivity Problems
When your VR controller loses connection unexpectedly, a bent battery contact spring is often the culprit. This problem shows up as your controller randomly disconnecting or failing to power on at all. You’ll notice the issue persists even after replacing batteries or restarting your headset.
The first step is to diagnose whether corrosion exists. Look through the ribbon cable slot at the battery compartment. You might see brownish or greenish discoloration on the metal parts. This corrosion prevents proper electrical contact between your battery and the controller’s circuit board.
Check if the spring moves freely by gently pressing on it with a plastic tool. If it doesn’t budge, you’ve found your problem. A stuck spring won’t push the battery into the correct position, breaking the electrical connection.
Test your controller’s response after any attempted fix. Power it on and see if it responds to button presses. If connectivity still fails, the spring likely needs more attention. Remove the battery again and inspect the spring’s position carefully.
Pay close attention to the ribbon cable during this process. Any damage to it creates additional connectivity problems beyond the spring issue. Handle it with extreme care when reassembling.
Document the spring’s original position before making adjustments. This helps you restore it correctly. Take photos if possible so you remember exactly how it sat before bending.
Once you’ve confirmed the spring moves smoothly and sits properly, your connectivity problems should resolve. Test multiple times before considering the repair complete. Persistent issues after proper spring restoration might indicate motherboard damage requiring professional help.
Final Thoughts
Fixing a bent contact spring feels tricky at first. But with patience, you can solve this problem yourself at home.
The whole process comes down to three things: careful disassembly, gentle reshaping, and thorough testing. Skip any of these steps, and you risk more damage.
Remember that your controller’s battery sled is a small but vital part. It connects power to every button and sensor inside.
A tiny bend in that spring can stop your whole device from working. That’s why small fixes make a big difference here.
Isopropyl alcohol and a foil ball are simple tools. They help loosen stuck springs without harsh chemicals or force.
Always work slowly and check your progress often. Rushing leads to snapped ribbon cables or broken clips. Those mistakes cost more time than the original problem.
If your first attempt doesn’t work, don’t panic. Open the compartment again and look closely at the spring’s position.
Sometimes a second try with slight adjustments makes the connection solid. Persistence pays off in most cases.
This repair saves you money on replacement controllers. It also keeps your gear working longer, which is good for your wallet and the planet.
Many VR users face this exact issue. Knowing how to fix it yourself builds confidence for future repairs too.
Keep your tools clean and organized during the process. A tidy workspace prevents lost screws and confused steps.
Testing after every change matters more than getting it perfect on the first attempt. Small checks along the way save you frustration later.
With these steps in mind, your controller should work like new again. Enjoy your VR sessions without connection worries holding you back.
Frequently Asked Questions
What causes a battery sled contact spring to bend in the first place?
Battery contact springs bend from regular wear and tear. The spring compresses every time you insert or remove a battery. Over time, the metal fatigues and loses its shape. Moisture and corrosion can also weaken the spring, making it more prone to bending.
Dropping your controller or applying too much pressure during battery changes accelerates this problem. The spring may also bend if debris gets stuck inside the battery compartment.
Can I fix a bent contact spring without opening my controller?
Unfortunately, no. You must open the battery compartment to access the spring directly. The spring sits inside the sled mechanism where you cannot reach it from outside.
Opening your controller takes only a few minutes. Remove the three screws from the battery door area. Disconnect the ribbon cable gently. Then you can reshape the spring.
Is isopropyl alcohol safe to use inside my VR controller?
Yes, 93% isopropyl alcohol is safe for this repair. It evaporates quickly and won’t damage electronic components. The alcohol dissolves corrosion and helps unstick the spring from debris.
Apply a small amount directly to the stuck contact. Let it sit for a minute. Then gently work the spring back and forth. Avoid using water or other liquids, as they can cause rust.
How do I know if my repair actually worked?
Test your controller’s battery connection right away. Insert a fresh battery and power on your device. The controller should connect to your headset within seconds.
Push gently on the contact spring with a plastic tool. It should move smoothly without resistance. If the spring still feels stuck or your controller won’t connect, repeat the process or try the aluminum foil method.

Hi, I’m Rosie Tate — a tech enthusiast, gadget geek, and the creator of RapidConvertLab! 🚀 I’ve spent years exploring the ever-evolving world of electronics, smart devices, and Amazon’s hidden tech treasures. Through my honest, hands-on reviews, I help everyday shoppers cut through the noise and pick gadgets that truly deliver value. When I’m not testing a new device, I’m probably unboxing one! 📦✨