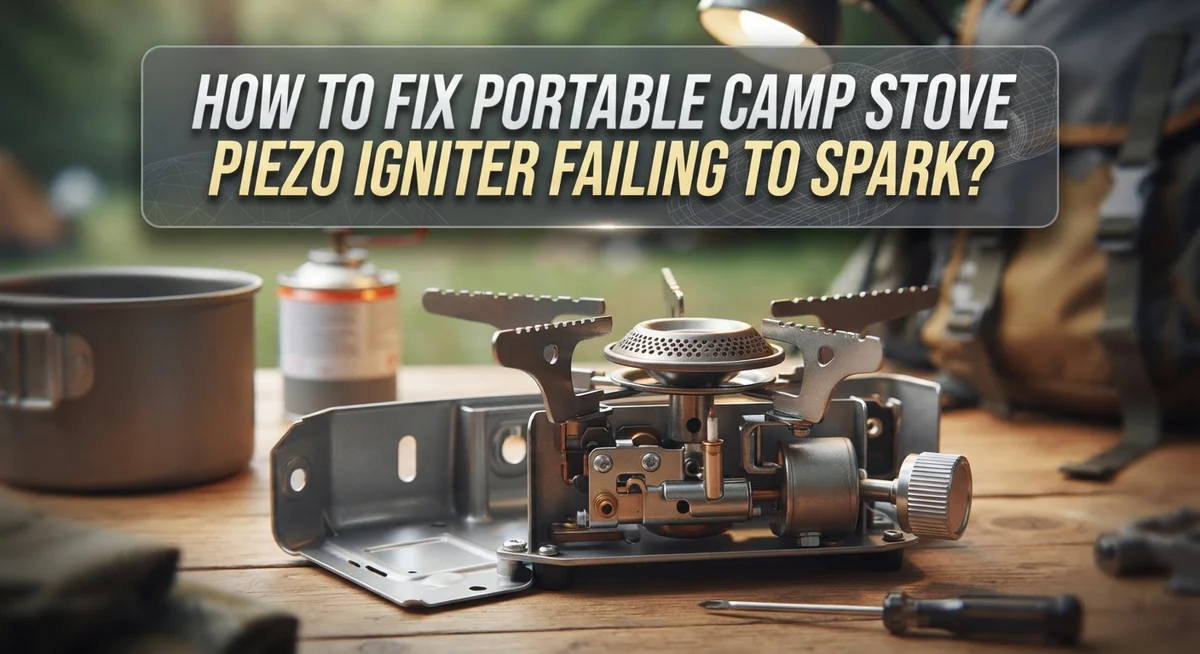
How To Fix Portable Camp Stove Piezo Igniter Failing To Spark?
You press the igniter button. Nothing happens. No spark, no click, no flame.
This is one of the most common problems with portable camp stoves. Your piezo igniter fails right when you need hot coffee or a quick meal.
The good news? You can fix this yourself in minutes. Most igniter problems come from simple causes.
Debris and moisture often block the spark. Dirt and food residue collect on the igniter tip over time. Sometimes the gap between the igniter and burner gets bent out of shape.
Wires can loosen or get damaged too. Even butane leaks or a jammed sparking wheel can stop your stove from lighting.
This guide walks you through every fix step by step. You will learn how to clean the igniter tip properly. We cover how to check and adjust the spark gap.
You will also discover how to inspect wires for damage. By the end, you will know exactly what causes igniter failure and how to solve it fast.
Your camp stove will spark like new again.
In a Nutshell
Here is a quick summary to help you fix that stubborn igniter fast.
-
Clean the igniter tip first. Use a soft brush to remove dirt, food bits, and moisture. This solves most spark problems right away.
-
Check the spark gap between the igniter and burner. A gap that is too small or too large stops the spark from jumping.
-
Bend the igniter gently to adjust the distance. Move it closer or farther from the burner until you hear a strong click.
-
Inspect the wires for damage or loose connections. A frayed or disconnected wire means no spark at all.
-
Look for butane leaks or a jammed sparking wheel. These issues can stop ignition even when the tip is clean.
-
Always listen for the click sound when you press the button. This tells you the igniter is actually firing.
-
Avoid rushing the cleaning step. Gentle wiping protects the tip from extra damage during your fix.
Follow these points in order, and your stove should spark again within minutes.
Understanding How a Piezo Igniter Works
A piezo igniter works by converting mechanical pressure into an electrical spark. When you press the button on your camp stove, you trigger a spring loaded mechanism inside.
This mechanism strikes a special crystal called piezoelectric material. The crystal responds to this physical strike by releasing electrical energy. This energy jumps across a small gap between the igniter tip and the burner electrode.
The spark ignites the fuel gas, and your stove lights up. The entire process happens in a fraction of a second. You hear a clicking sound as the spring snaps back into place.
The spark gap is the space between where the electricity jumps. A larger gap creates a stronger, more powerful arc. However, a gap that is too large prevents the spark from reaching across.
Debris blocks this electrical path. Even tiny particles of dirt, food residue, or moisture can stop the spark completely. The electricity cannot jump through solid material.
The igniter tip must stay clean and dry for reliable operation. Any buildup reduces the spark strength. Over time, moisture from cooking or rain can accumulate on the tip.
The wires connecting the igniter button to the crystal must stay intact. Loose connections break the electrical circuit. Damaged wires prevent power from reaching the crystal at all.
The spring mechanism must also move freely. If it gets jammed or stuck, the button won’t strike the crystal with enough force. This results in a weak spark or no spark at all.
Understanding these components helps you identify why your igniter fails. Most problems stem from simple issues like debris, moisture, or gap misalignment. The good news is that all of these issues are fixable.
Common Causes of Igniter Spark Failure
Piezo igniters fail to spark for several specific reasons. Understanding these causes helps you fix the problem quickly.
Debris and moisture are the most common culprits. Food particles, dust, and water accumulate on the igniter tip over time. This buildup blocks the electrical path the spark needs to travel. Even a thin layer of moisture prevents ignition. Your stove sits outside where rain and humidity reach it easily.
The spark gap distance is another frequent issue. This gap is the space between the igniter tip and the burner electrode. When this distance is too large, the spark cannot jump across it. When it is too small, the spark gets blocked or misdirected. Temperature changes and regular use can shift this gap gradually.
Loose or damaged wires prevent electricity from reaching the igniter crystal. Vibration during transport loosens connections. Exposure to moisture causes corrosion on wire terminals. A broken wire stops current flow completely, and no spark occurs.
Butane leaks reduce fuel pressure inside the stove. Without proper pressure, the burner cannot ignite even when the spark fires. You might hear the click sound but see no flame.
A jammed sparking wheel stops the mechanical action needed to create pressure. Inside the igniter button, a small wheel strikes the piezoelectric crystal. If this wheel gets stuck from debris or damage, no pressure builds up.
Incorrect assembly after previous repairs causes problems too. Wires might be reconnected wrong. The igniter crystal could be positioned incorrectly.
Each of these issues has a simple fix. Start with cleaning, then check the gap and wires. Most failures resolve with basic maintenance and adjustment.
Step-by-Step: Cleaning the Igniter Tip
Start by gathering a soft brush, a dry cloth, and a small container of water. You need these tools to safely clean the igniter tip without causing damage.
Locate the igniter tip on your camp stove. This small component sits near the burner opening. The tip is where the spark actually forms. Turn off your stove completely and let it cool for several minutes before touching any parts.
Use your soft brush to gently sweep away loose debris from the igniter tip. Move the brush in one direction only. This prevents pushing dirt deeper into crevices. Remove food residue, dust, and any visible buildup. Be gentle because the tip is fragile and can break easily.
Wipe the tip with a dry cloth next. This removes fine particles the brush missed. Check if moisture sits on the surface. Moisture blocks the spark from forming properly. If you see dampness, let the stove air dry completely. You can also use a dry cloth to absorb any moisture quickly.
Inspect the cleaned tip under good lighting. Look for scratches, cracks, or pitting on the surface. Small imperfections can still allow sparking to work. Larger damage means you need replacement parts.
Test your stove after cleaning. Press the ignition button and listen for a clicking sound. You should see a small spark near the burner. If sparking still fails, the problem likely sits elsewhere. Move on to checking the spark gap distance next. A clean igniter tip is your first step toward a working camp stove again.
Step-by-Step: Checking and Adjusting the Spark Gap
The spark gap is the space between your igniter tip and the burner electrode. This gap must be just right for electricity to jump across and create a spark. Too large a gap, and the spark cannot reach the burner. Too small a gap, and the spark may not ignite the fuel properly.
Start by examining the gap with good lighting. Look closely at the distance between the igniter tip and the burner electrode. The gap should typically be between 2 to 4 millimeters, though your stove’s manual may specify a different measurement.
If the gap looks too large, you need to bend the igniter closer to the burner. Use a small tool like a flathead screwdriver or hex key. Gently apply pressure to move the igniter bracket slightly toward the electrode. Make small adjustments only. Large movements can damage the igniter or create other problems.
If the gap looks too small, bend the igniter slightly away from the burner. Again, use gentle pressure and make minor adjustments. Test your stove after each small change.
After adjusting, press the igniter button several times. Listen for the clicking sound that indicates sparking is happening. If you hear clicks but still see no flame, the gap may need further adjustment.
Keep the gap clean during this process. Debris can settle into the space and block the spark. Wipe both the igniter tip and the burner electrode with a dry cloth before and after adjusting.
Once you find the correct gap distance, your stove should spark reliably. Write down the working measurement so you can reference it later if problems return.
Inspecting Wires and Electrical Connections
Wires and electrical connections are critical for your piezo igniter to work properly. These components carry the electrical signal from the button to the crystal that creates the spark. When connections fail, your stove won’t ignite even if other parts are fine.
Start by locating where the igniter wires connect to the button mechanism. Look for any visible damage like cracks, splits, or exposed copper wire. Damaged insulation can cause electrical shorts that prevent sparks from forming.
Gently wiggle the wire connections at both ends. A loose connection breaks the electrical path and stops spark generation. If a wire feels loose, you may need to reseat it firmly into its connector. Push the wire connector back into place until you hear or feel it click.
Check the actual wire path along your stove body. Wires can get pinched, bent sharply, or crushed during transport or storage. Sharp bends weaken the wire and can break the internal copper strands. If you find a kinked section, carefully straighten it by hand.
Inspect the connection point where wires meet the igniter crystal itself. This joint must be clean and tight. Corrosion or oxidation at this connection point blocks electrical flow. Use a dry cloth to gently clean any discoloration from the metal contacts.
Test your stove after checking all connections. Press the igniter button multiple times and listen for clicks. If you still don’t see sparks after confirming all wires are intact and tight, the problem likely lies elsewhere. Document which connections were loose so you can monitor them during future uses.
Testing the Fix and Confirming a Strong Spark
After you’ve cleaned the igniter tip, adjusted the spark gap, and checked all wires, it’s time to test your work. This step confirms whether your fix actually solved the problem.
Find a safe outdoor location away from people and pets. Make sure your camp stove sits on a flat, stable surface. Place your hand near the burner so you can feel the spark without touching it directly.
Press the igniter button slowly and deliberately. Listen carefully for a distinct clicking sound. You should hear a sharp “click” with each button press. This click means the piezo crystal is firing and creating electrical current.
Watch the igniter tip closely as you press the button. A healthy spark appears as a small bright flash near the burner electrode. The spark should be white or blue in color. It needs to jump across the gap consistently with every button press.
Press the igniter button at least five to ten times in a row. A strong spark should appear every single time. If it sparks once or twice then stops, you may have a loose wire or incomplete fix.
Now test the actual flame. Turn on the gas valve slightly and press the igniter button. The burner should light immediately. If the stove lights every time you press the button, your fix worked successfully.
If you still see weak or no sparks, return to your previous steps. Double check that the gap distance is correct. Verify all wire connections are tight. Clean the igniter tip one more time with extra care. Sometimes debris hides in small crevices and requires a second cleaning pass.
A properly functioning piezo igniter produces a visible spark and lights your stove reliably every single time.
Mistakes to Avoid When Repairing a Piezo Igniter
Repairing your piezo igniter requires care and attention. Making mistakes during the process can damage your stove further or make the problem worse.
The biggest mistake is using harsh tools on the igniter tip. Never scrub with metal brushes or abrasive pads. These tools scratch the ceramic crystal inside the tip, which stops spark generation completely. Always use a soft brush or cloth for cleaning. Gentle pressure works best.
Another common error is forcing the igniter button repeatedly when it won’t spark. Pressing hard or fast can crack internal components. Press slowly and deliberately instead. If nothing happens after three gentle presses, stop and investigate the problem rather than continuing to force it.
Ignoring wire connections is a serious mistake. Many people assume the igniter tip is always the problem. Loose wires often cause spark failure too. Check connections before and after repairs. A wiggling wire at the button mechanism or crystal connection point can prevent your stove from working.
Adjusting the spark gap incorrectly also causes issues. Bending the igniter too far from the burner creates a gap too large for sparks to jump. Bending it too close can cause the tip to touch the burner electrode. Either situation prevents proper ignition. Make small, careful bends instead of big adjustments.
Never ignore moisture on your igniter. Wet tips won’t spark reliably. Always dry the tip completely after cleaning. Store your stove in a dry place to prevent moisture buildup.
Finally, avoid working on your stove indoors or near flammable materials. Even during repairs, accidental sparks can occur. Work outside in a safe, open space away from people and pets. These precautions protect both your equipment and your safety.
Troubleshooting Persistent Spark Problems
When your piezo igniter keeps failing to spark, the problem usually stems from one of three sources: debris blocking the spark path, an incorrect gap between the igniter and burner, or internal component damage.
Start by examining the igniter tip closely. Debris and moisture are the most common culprits. Food residue, dust, or water droplets can block the electrical path needed for sparking. Use a soft brush to gently clean the tip. Wipe away any visible dirt or moisture with a dry cloth. This simple step fixes many spark failures.
Next, check the spark gap distance. The gap is the space between your igniter tip and the burner electrode. If this gap is too wide, the spark cannot reach the burner. If it’s too tight, the spark may not form correctly. A larger gap actually creates a stronger electrical arc. Carefully bend the igniter end closer to or farther from the burner to find the right position. Test after each small adjustment.
If cleaning and gap adjustment don’t work, inspect the igniter button mechanism for visible damage. Look for cracks or wear on the piezo crystal itself. Check whether the sparking wheel spins freely when you press the button.
Listen carefully when pressing the igniter button. You should hear a distinct clicking sound with each press. No click often means the internal mechanism is jammed or the piezo crystal is broken.
Butane leaks can also prevent sparking because they disrupt the electrical circuit. Check for hissing sounds near the fuel connection.
Persistence pays off when troubleshooting spark problems. Work through each potential issue systematically. Most failures resolve with cleaning, gap adjustment, or wire inspection before you need replacement parts.
Final Thoughts
Fixing a piezo igniter is a simple task. You don’t need special tools or expert skills. Most problems come from dirt, moisture, or a wrong spark gap.
Start with the basics. Clean the igniter tip first. This solves most sparking issues right away.
Check the gap between the igniter and burner next. A gap that’s too wide or too narrow stops the spark from forming.
Loose wires cause silent failures too. Always inspect connections before assuming your igniter is broken.
Patience matters here. Rushing through repairs often leads to more damage. Take your time with each step.
Test your stove outdoors after every adjustment. This keeps you safe and confirms your fix works.
Many campers panic when their stove won’t light. But this problem rarely means you need a new stove.
Simple maintenance prevents most igniter failures. Wipe your stove after each trip. Store it in a dry place.
Check the spark gap every few months. This small habit saves you from bigger headaches later.
If your igniter still fails after cleaning and adjusting, check for butane leaks. A weak gas flow disrupts the spark even when the igniter itself works fine.
Some stoves have igniters that wear out completely. In these rare cases, you may need a replacement part. But this happens only after months or years of regular use.
Most spark failures are fixable at home. You just need clean tools, good lighting, and a bit of patience.
Your camp stove should serve you well for many trips ahead. Regular care keeps that piezo igniter working when you need it most.
Frequently Asked Questions
Why does my piezo igniter click but won’t spark?
A clicking sound without a spark usually means debris is blocking the igniter tip. Food residue, dirt, or moisture prevents the electrical arc from forming. Use a soft brush to gently clean the tip. Wipe away any buildup carefully. If clicking continues after cleaning, the spark gap may be too wide. The distance between your igniter and burner matters. Try bending the igniter slightly closer to the burner.
Can I fix a wet igniter tip?
Yes. Moisture is one of the most common spark killers. Let your stove dry completely in a warm, dry place for several hours. You can also use a soft, dry cloth to gently wipe the igniter tip. Avoid using paper towels that leave fibers behind. Once dry, test the spark outdoors. Prevention helps too. Store your stove in a dry location between camping trips.
What should I do if adjusting the gap doesn’t help?
Check your igniter wires for loose connections or visible damage. Loose wires cause silent failures where nothing happens when you press the button. Look at where the wire connects to the igniter. Tighten any loose connections if possible. If wires appear cracked or burned, the igniter may need replacement. Also listen for hissing sounds, which indicate butane leaks. Leaks disrupt the electrical circuit needed for sparking.
How do I know if my igniter is permanently damaged?
If cleaning, drying, and gap adjustment all fail, internal damage may have occurred. Press the button and listen carefully. You should hear a distinct clicking or snapping sound. No sound at all suggests a broken sparking mechanism inside. Test multiple times to be sure. At this point, the igniter likely needs professional service or replacement.

Hi, I’m Rosie Tate — a tech enthusiast, gadget geek, and the creator of RapidConvertLab! 🚀 I’ve spent years exploring the ever-evolving world of electronics, smart devices, and Amazon’s hidden tech treasures. Through my honest, hands-on reviews, I help everyday shoppers cut through the noise and pick gadgets that truly deliver value. When I’m not testing a new device, I’m probably unboxing one! 📦✨