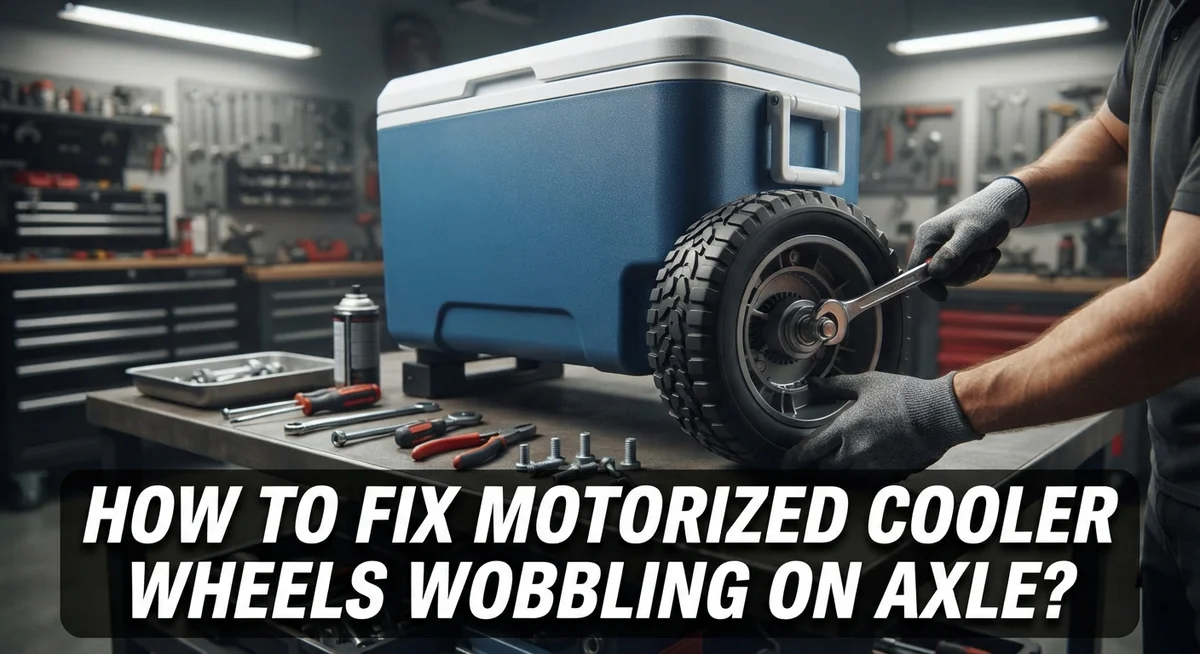
How To Fix Motorized Cooler Wheels Wobbling On Axle?
Does your motorized cooler wobble every time you switch it on? That shaky wheel can turn a fun outing into a frustrating mess.
The good news is you can fix this problem at home. Most wobbling issues come from loose bearings or a misaligned axle.
Sometimes the fix is as simple as adjusting your tire pressure. Other times, you need to check the threaded rod and lock nuts.
This guide walks you through every step to solve the wobble. We will cover the core causes behind this annoying issue.
You will learn how to inspect your bearings properly. We also show you how to realign your rim and axle for smooth spins.
Plus, we share quick fixes like using Teflon tape to secure loose rods. This trick keeps everything tight and steady.
We will also point out common mistakes people make during repairs. Avoiding these errors saves you time and effort.
By the end of this article, your cooler wheels will roll smoothly again. Let’s get your ride back on track!
In a Nutshell
Here is a quick summary to help you fix that wobble fast.
-
Check your bearings first. Loose or worn bearings on the axle are the most common cause of wheel wobble. Tighten them and make sure the lock nuts are secure.
-
Wrap the threaded rod with Teflon tape. Use about 5 to 6 layers to keep it snug inside the front bearing. This small fix often stops the wobble instantly.
-
Inspect your rim and axle alignment. A misaligned rim can throw off the whole wheel. Straighten it before you tighten anything else.
-
Adjust your tire pressure. Aim for 45 psi. If the tire still feels off, deflate it, massage the bead, then reinflate.
-
Avoid over tightening. Too much force creates friction and can damage your bearings further.
-
Grease the trailing arm parts regularly. This keeps everything moving smoothly and prevents future wobbling.
Follow these simple steps, and your cooler wheels will spin evenly again in no time.
Why Motorized Cooler Wheels Wobble On The Axle
Motorized cooler wheels wobble on the axle for several clear reasons. Understanding these causes helps you fix the problem quickly and prevent it from happening again.
Loose bearings are the top culprit. The bearings sit on your axle and hold the wheel in place. When they loosen over time, your wheel shifts side to side instead of rolling straight. This creates that annoying wobble you feel.
The threaded rod can slip out of position inside the front bearing. This rod connects parts of your wheel assembly. When it moves, the entire wheel becomes unstable. The rod needs to stay firmly seated in the bearing to work properly.
Worn motor axle bearings also cause problems. These bearings support the weight of your cooler and the wheel. If they wear down, they can’t hold the wheel steady anymore.
Rim and axle misalignment happens when these parts don’t line up correctly. Even a small gap throws off the wheel’s balance. Your wheel then spins off center, creating visible wobbling.
Tire pressure issues matter more than many people realize. Low tire pressure causes the tire to sit unevenly on the rim. The wheel then rocks back and forth as it rolls. High pressure can also create problems by changing how the tire sits.
Lastly, improper bearing installation causes wobble right away. If you recently replaced bearings or serviced your wheel, they might not be seated correctly. The bearing cone and lock nuts need to fit together precisely.
These causes often work together. A loose bearing combined with low tire pressure creates worse wobbling than either problem alone. Check all these areas when diagnosing your cooler wheel issue.
Tools And Parts You’ll Need Before You Start
Before you start fixing your motorized cooler wheels, gather the right tools and parts. This preparation saves time and prevents frustration during the repair process.
You will need basic hand tools first. A wrench set helps you loosen and tighten nuts on the axle. Socket wrenches work especially well for bearing nuts because they grip firmly without slipping. An adjustable wrench gives you flexibility if your cooler uses different nut sizes.
A tire pressure gauge is essential. You need to check and adjust your tire pressure to the correct level. An air pump or compressor lets you inflate or deflate tires as needed.
Teflon tape comes next on your list. This material wraps around the threaded rod to prevent slipping inside the bearing. Keep several rolls available since you may need multiple layers for a secure fit.
You should have bearing grease ready. This lubricant keeps your bearings moving smoothly and reduces friction. Quality bearing grease extends the life of your wheel assembly significantly.
A clean cloth or rag helps you wipe away old grease and dirt. Cleanliness matters because debris can cause bearings to bind up. Inspect parts more clearly when everything is clean.
A small container holds loose nuts and bolts while you work. This prevents losing small parts that are hard to replace. Organization keeps your repair project moving forward.
Finally, have a jack or lift available. You need to raise your cooler safely to remove the wheel. Never work under a raised cooler without proper support.
Collect these items before starting. Having everything ready means your repair goes smoothly and quickly.
Step-By-Step: Diagnosing The Source Of The Wobble
Start by removing the wheel from your motorized cooler. This gives you full access to the axle assembly. Place the wheel on a clean, flat surface where you can work comfortably.
Spin the wheel by hand slowly. Pay close attention to how it moves. A smooth rotation means the bearings are likely fine. A grinding sound or resistance tells you something is wrong inside the bearing assembly.
Next, inspect the cone and lock nuts on the axle. Look for visible looseness or gaps. Try to wiggle the wheel side to side while it sits on the axle. Excessive movement means loose bearings need tightening.
Check the threaded rod position carefully. It should sit flush inside the front bearing without sticking out. If it has shifted, that’s your wobble source.
Examine the rim and axle alignment closely. Place a straight edge across the rim. Does it line up with the axle centerline? Misalignment here creates immediate wobbling when the wheel spins.
Feel the tire pressure next. Press your thumb into the tire sidewall. A properly inflated tire resists pressure firmly. A soft tire or over inflated tire both cause wobbling during rotation.
Look for wear patterns on the tire surface. Uneven wear spots suggest alignment issues. Bald patches indicate pressure problems.
Grab the wheel firmly and try rotating it again. Listen for any clicking or grinding noises. These sounds point directly to bearing problems or axle damage.
Take photos of what you find. This helps you remember which parts need attention. Write down which symptoms you noticed. This information guides your repair work perfectly.
Step-By-Step: Tightening Bearings And Securing The Threaded Rod
Start by removing the wheel from your motorized cooler. You’ll need clear access to the bearings and threaded rod underneath.
Locate the cone nut and lock nut on the axle. The cone nut sits closest to the wheel, while the lock nut secures everything in place. Gently tighten the cone nut first by turning it clockwise with your wrench.
Turn slowly and deliberately. You want snug pressure, not force. Stop immediately if you feel resistance or hear grinding sounds.
Once the cone nut feels firm, check that the wheel still spins freely by hand. Spin it several times to verify smooth rotation. If it drags or catches, you over tightened. Back off the cone nut slightly and try again.
Now focus on the threaded rod. This rod often slips inside the front bearing and causes wobbling. Wrap the threaded rod with Teflon tape using five to six layers. This creates friction that keeps the rod locked in position.
After wrapping, reinstall the rod into the front bearing. Push it in firmly until it seats completely.
Next, tighten the lock nut against the cone nut. Turn it clockwise until both nuts press together snugly. This sandwich effect locks everything in place and prevents movement.
Spin the wheel again to confirm smooth operation. It should rotate freely without wobbling side to side.
Reattach the wheel to your motorized cooler. Test the wheel by spinning it manually one final time before using the cooler.
Check your work the next day. Bearings sometimes settle after use, so verify tightness again if wobbling returns.
Fixing Rim, Axle, And Tire Pressure Alignment Issues
Rim and axle alignment problems happen when these two parts don’t sit perfectly straight relative to each other. This misalignment creates the wobbling sensation you feel when the cooler moves.
Start by removing the wheel completely from your motorized cooler. Place it on a flat, level surface. Spin the wheel slowly by hand and watch carefully. If the rim moves side to side instead of straight, you have an alignment issue.
Check the axle mounting points where it connects to the cooler frame. Look for bent metal or loose fasteners. Tighten any bolts you find. A loose connection lets the axle shift during movement, which throws off your alignment.
Next, inspect the rim itself for damage. Run your hand along the inside edge. Feel for dents, warping, or bent sections. Even small deformations cause noticeable wobble at higher speeds.
Examine the distance tube positioned between the bearings on your axle. This tube must sit correctly to keep the rim centered. If it shifted, carefully reposition it and tighten the lock nut firmly.
Verify that the threaded rod stays perfectly perpendicular to the axle. Misalignment here forces the rim out of center. Use a straight edge or level tool to check this angle.
After making adjustments, spin the wheel multiple times. It should rotate smoothly without side to side movement. If wobbling continues, the rim itself may be damaged beyond simple adjustment.
Reattach the wheel and test your motorized cooler on flat ground. The wobble should disappear. If problems persist, the rim may need replacement rather than realignment.
Common Mistakes That Make Wheel Wobble Worse
Over-tightening the cone nut is the biggest mistake people make. When you crank down too hard, the bearings bind up and create friction instead of smooth rotation. The wheel will feel stiff and may not spin freely at all.
Ignoring tire pressure causes wobbling that feels like a bearing problem. Low pressure makes the tire bulge unevenly, which throws off the entire wheel balance. High pressure creates a hard, bouncy ride that magnifies small misalignments. Check your tire pressure regularly and adjust it to the proper level for your cooler model.
Skipping the axle alignment check is another common error. Many people assume the rim sits perfectly straight without verifying it. A bent axle or misaligned mounting point will cause wobbling no matter how tight your bearings are. Always inspect the axle connection points on your cooler frame.
Neglecting to wrap the threaded rod properly leads to loose bearings. The rod needs secure positioning in the front bearing to prevent movement. Without proper wrapping, the rod shifts during use and causes the wheel to bounce side to side.
Using old, dirty grease makes everything worse. Contaminated grease clogs the bearing races and prevents smooth movement. This friction feels like wobbling and gets worse over time.
Finally, reattaching the wheel too quickly without testing causes problems later. Always spin the wheel several times by hand after repairs to confirm smooth operation. Test your cooler on flat ground before using it normally. These simple checks catch mistakes before they damage your equipment further.
Ongoing Maintenance To Prevent Future Wobbling
Keeping your motorized cooler wheels in top shape prevents wobbling from returning. Regular inspections catch problems early before they get worse. Check your wheel bearings every month if you use your cooler frequently.
Start by spinning each wheel by hand. Listen for grinding sounds. Feel for unusual resistance. These signs tell you bearings need attention soon.
Grease your trailing arm components every few months. Clean grease works better than old, dirty grease. Apply new grease to all connection points where the wheel attaches to your cooler frame. This reduces friction and keeps everything moving smoothly.
Check tire pressure before each use. Incorrect pressure causes wobbling that mimics bearing problems. Maintain the recommended pressure level for your specific wheel type. Underinflated tires create more wobble than overinflated ones.
Inspect the motor and wheel to axle connection regularly. Tighten any loose bolts or fasteners you find. A simple tightening session takes just minutes but prevents major issues.
Watch for wear patterns on your tire surface. Uneven wear signals alignment problems. Address these quickly before they worsen.
Store your motorized cooler on flat, dry ground. Moisture causes rust on metal parts. Rust weakens bearings and axle connections.
Keep the distance tube positioned correctly between bearings. This small component prevents side to side movement. Verify it stays in place during routine checks.
Test your cooler on flat ground monthly. Push it straight ahead and listen for any unusual sounds. Feel for vibrations through the handle.
These simple habits add months or years to your wheel life. Consistent maintenance beats emergency repairs every time.
Advanced Troubleshooting When The Wobble Persists
When your motorized cooler wheel still wobbles after basic fixes, you need to dig deeper. Advanced troubleshooting requires patience and systematic checking.
Start by removing the wheel again and inspecting the threaded rod closely. Look for bending or damage that basic tightening won’t fix. A bent rod needs replacement because it prevents proper alignment no matter how tight you make the bearings. Spin the wheel slowly by hand and watch if it moves side to side even when stationary.
Next, check if your cone nut has internal damage. Sometimes the threads strip from over tightening in previous attempts. You’ll notice the nut spins freely without gripping the bearing. This requires replacing the cone nut entirely.
Examine your bearings under good lighting. Damaged bearings have flat spots, pits, or discoloration. These won’t disappear with tightening. Worn bearings need replacement to stop wobbling permanently.
Test your axle itself for straightness. Place it on a flat surface and roll it slowly. A curved or bent axle creates wobbling that no bearing adjustment fixes. This also requires replacement.
Check if your motor mounting bolts are loose. A motor that shifts on its mount transfers that movement to the wheel. Tighten all motor bolts securely to the cooler frame.
Finally, verify your wheel rim isn’t bent. Spin the wheel on the axle without the tire. If the rim itself wobbles, the wheel needs replacement.
Document what you find at each step. This helps you understand which component actually needs replacing. Sometimes multiple issues exist together, and fixing just one won’t solve your problem completely.
Final Thoughts
Fixing a wobbling wheel on your motorized cooler does not need to feel impossible. Most problems come from just a few simple causes. Loose bearings, misaligned rods, and wrong tire pressure top the list.
You now know how to check each part. You know how to tighten, adjust, and test your wheel properly. This knowledge saves you time and money.
Start with the easiest fixes first. Check your tire pressure. Inspect your bearings. Look at the axle alignment. Many wobbles disappear after these basic steps.
If the wobble stays, move to deeper checks. Look closely at your threaded rod and cone nut. Examine your axle for bends or damage. These steps solve most stubborn cases.
Remember that patience matters here. Rushing through repairs often creates new problems. Take your time with each adjustment.
Test your wheel after every change you make. Spin it by hand first. Then test your cooler on flat ground. This confirms your fix actually worked.
Regular maintenance keeps wobbling away for good. A few minutes of checking now prevents bigger headaches later. Your wheels will thank you with smoother rides.
Motorized coolers work hard for you. They carry your drinks, food, and gear across yards, campsites, and tailgates. A stable wheel keeps that job easy and safe.
Do not ignore small wobbles when they start. Small issues grow into bigger ones fast. Address problems early to avoid replacing parts later.
You have the tools and steps needed now. Trust the process, work through each check, and your cooler will roll smooth again. A wobble free wheel means more fun and less frustration on your next outing.
Frequently Asked Questions
Why does my motorized cooler wheel wobble even after I tighten the nuts?
Wobbling often continues because loose bearings sit inside the axle assembly. Tightening the lock nut alone does not fix worn or improperly seated bearings. You need to check the cone nut and inner bearing first. Spin the wheel by hand to feel for grinding or rough spots. If rotation feels bumpy, the bearing itself needs adjustment or replacement.
Can tire pressure cause wheel wobbling?
Yes, absolutely. Low or uneven tire pressure creates visible wobbling during use. Check your tire pressure before each use and aim for 45 psi. If your tire pressure is correct but the bead sits loose on the rim, deflate the tire slightly. Massage the tire bead back into place, then reinflate to proper pressure.
What does it mean when my wheel wobbles side to side?
Side to side wobbling points to rim and axle misalignment. Remove the wheel and inspect both the rim and the threaded rod carefully. Look for bent sections or damage. Place the wheel on a flat surface and spin it slowly. Watch where it moves. Misaligned components need straightening or replacement.
Should I wrap my threaded rod with tape?
Wrapping the threaded rod with Teflon tape helps secure it in the front bearing. Apply 5 to 6 layers around the rod. This prevents the rod from shifting during use and reduces wobbling caused by loose connections.
When should I replace bearings instead of adjusting them?
Replace bearings if you see flat spots, pits, or discoloration under good lighting. Damaged bearings cannot be tightened back to smooth operation. Listen for grinding sounds when the wheel spins. Grinding means the bearing surface has worn beyond repair.

Hi, I’m Rosie Tate — a tech enthusiast, gadget geek, and the creator of RapidConvertLab! 🚀 I’ve spent years exploring the ever-evolving world of electronics, smart devices, and Amazon’s hidden tech treasures. Through my honest, hands-on reviews, I help everyday shoppers cut through the noise and pick gadgets that truly deliver value. When I’m not testing a new device, I’m probably unboxing one! 📦✨