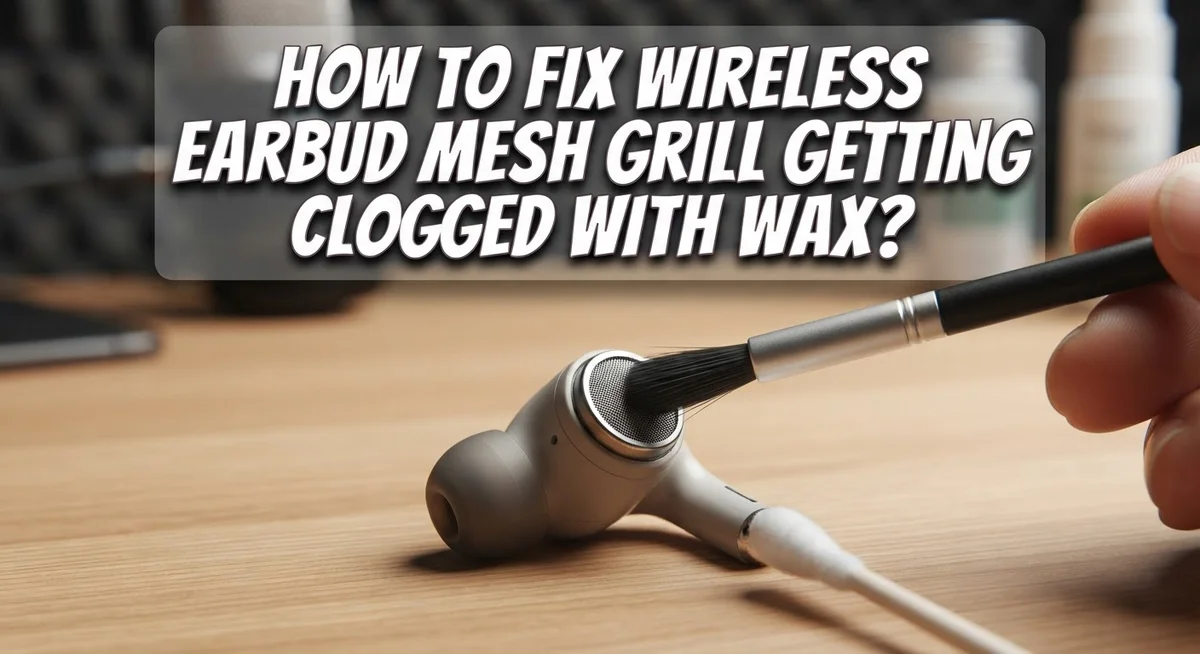
How to Fix Wireless Earbud Mesh Grill Clogged With Wax?
Do your earbuds sound muffled lately? Chances are, earwax is the culprit. That tiny mesh grill on your earbuds does a lot of work, and it often pays the price.
Earwax naturally builds up on the mesh grill over time. This happens even when you use rubber tips. The wax blocks sound waves and makes your music or calls sound weak and unclear.
The good news? You can fix this problem at home. You don’t need fancy tools or a trip to the store.
This guide walks you through simple, safe cleaning methods. We will cover how hydrogen peroxide and rubbing alcohol help soften and dissolve stubborn wax. You will also learn the exact steps to clean your mesh grill without causing damage.
In a Nutshell
- Wax buildup on the mesh grill often causes muffled or low sound in wireless earbuds.
- Soften stubborn wax first. Use hydrogen peroxide and let it sit for about 5 minutes before cleaning.
- Rubbing alcohol works too, but use it carefully. It dissolves wax fast and may harm delicate parts if overused.
- Try mounting putty for a gentle, mess free way to lift wax right out of the mesh.
- If your ear tips are removable, wash them with mild soap and lukewarm water for a deeper clean.
- Always be gentle. Pressing too hard can push wax deeper into the mesh instead of removing it.
- Let everything air dry completely before using your earbuds again.
- Prevent future clogging by wiping your earbuds after each use and giving your ears occasional breaks.
- Avoid sharing earbuds with others to keep wax and bacteria from spreading between devices.
Why Earwax Clogs Your Earbud Mesh Grill
Your ear canal produces earwax naturally. This waxy substance protects your ears and keeps them clean. However, when you wear earbuds regularly, the mesh grill traps this wax over time.
The mesh grill sits right at the sound opening. Wax particles stick to it easily because the surface is textured and porous. Even though rubber ear tips cover most of the opening, wax still finds its way through small gaps and seams.
Earwax is a waxy, oily substance. It doesn’t dissolve in water alone. This makes it stick firmly to mesh material. The longer earbuds stay in your ears, the more wax accumulates on that grill.
When wax builds up on the mesh, sound waves have trouble passing through. You notice the volume drops. Music sounds muffled and distant. Bass frequencies disappear first because low sounds need clear pathways to reach your ear.
The problem gets worse over time. More wax layers pile on top of each other. The mesh becomes completely blocked. At this point, your earbuds barely produce any sound at all.
Different ear types produce different amounts of wax. Some people naturally make more earwax than others. If you have a waxy ear type, your earbuds will clog faster. Humidity and sweat also speed up wax buildup during workouts.
The good news? This problem is completely fixable. You don’t need to replace your earbuds. Simple cleaning methods work well when done correctly. Understanding why wax clogs your mesh helps you clean effectively and prevent future buildup. Regular maintenance keeps your earbuds sounding crisp and clear.
Signs Your Mesh Grill Needs Cleaning
Your earbuds are trying to tell you something when sound quality drops. Reduced volume is the first sign that wax has clogged your mesh grill. You notice music sounds quieter even when you turn up the volume all the way.
Muffled or distorted audio comes next. Voices sound unclear. Bass loses its punch. High notes become fuzzy instead of crisp. This happens because earwax blocks sound waves from reaching your ears properly.
You might also notice uneven sound between the two earbuds. One side plays louder than the other. This tells you that wax buildup is worse on one mesh grill than the other.
Look directly at your mesh grill under good lighting. Do you see a yellowish or brownish film? That’s earwax sitting on top of the mesh. Sometimes you can spot it easily. Other times the wax sits deeper inside the mesh holes.
Pay attention to how your earbuds feel in your ears too. They might feel less secure or uncomfortable. Wax buildup can change how the ear tips seal, affecting both sound and fit.
Another clue is when your earbuds worked fine yesterday but sound bad today. Sudden changes in sound quality usually mean fresh wax has accumulated. This is especially common if you exercise regularly or live in a warm, humid climate.
Don’t ignore these signs. The longer you wait, the more wax piles up inside the mesh. This makes cleaning harder later. Act quickly when you notice any of these problems. Your earbuds will thank you with crystal clear sound again.
What You’ll Need Before You Start
Before you begin cleaning your earbud mesh grill, gather a few basic items from around your home. You likely already have most of these supplies.
Cleaning solutions are your first priority. Hydrogen peroxide works best because it softens earwax without damaging delicate mesh components. Rubbing alcohol is another option, though it requires careful handling. Both liquids dissolve earwax effectively when given time to work.
You’ll need soft applicators to apply these solutions safely. Cotton swabs work well for precise application on the mesh grill. Small soft bristle brushes help lift debris without pushing wax deeper into the grill. Avoid using hard or stiff brushes that could damage the mesh.
Prepare drying materials before you start. Paper towels or lint free cloths work best for patting earbuds dry. Never use tissues because they leave fibers behind. Have these ready so you can dry your earbuds immediately after cleaning.
Optional items make the process easier. A small bowl holds your cleaning solution if you need to soak ear tips. Mounting putty provides an alternative removal method for stubborn wax buildup. A magnifying glass or desk lamp helps you see the mesh grill clearly during inspection.
Safety items matter too. Wash your hands before handling your earbuds. Keep a clean workspace free of dust and debris. This prevents dirt from getting into your earbuds during cleaning.
Check that your earbuds are fully charged or powered off before cleaning. This protects your device’s electronics. Never rush this preparation step. Taking time to gather supplies prevents mistakes during the actual cleaning process.
Step-by-Step: Removing Wax From the Mesh Grill
Start by powering off your earbuds completely. This keeps you safe during the cleaning process and protects the internal electronics from any liquid exposure.
Remove the ear tips first. Most wireless earbuds have rubber or silicone tips that slide off easily. Gently twist and pull them away from the speaker housing. Set them aside on a clean surface.
Examine the exposed mesh grill under bright light. You’ll see the wax buildup more clearly now. This helps you understand how much cleaning you need to do.
Apply hydrogen peroxide to the mesh. Use a cotton swab or small soft applicator to dab the solution directly onto the clogged areas. Hydrogen peroxide works because it softens earwax without damaging delicate mesh components.
Wait for five minutes. This waiting period lets the hydrogen peroxide penetrate and break down the wax. Don’t skip this step or rush it.
After five minutes, use a clean, dry cotton swab to gently wipe away the softened wax. Work slowly and use light pressure. Pushing too hard can force wax deeper into the mesh or tear the grill.
For stubborn spots, apply rubbing alcohol on a fresh swab. Alcohol dissolves earwax effectively since wax is an oily substance. Let it sit for two minutes, then gently wipe again.
Repeat the gentle wiping until no more wax comes away. The mesh should look noticeably clearer.
Allow everything to dry completely. Place your earbuds on a clean cloth in a warm, dry area for at least two hours. Air drying prevents moisture from entering the speaker. Once dry, reattach your ear tips and test the sound quality. Your audio should sound noticeably clearer and louder now.
Choosing the Right Cleaning Solution for Your Buds
When you’re ready to clean your earbud mesh grill, picking the right cleaning solution makes all the difference. Your choice depends on how stubborn the wax buildup is and what you have available at home.
Hydrogen peroxide works best for most situations. This solution softens earwax without being too harsh on delicate mesh. The chemical breaks down wax particles and makes them easier to remove. Apply it with a cotton swab and let it sit for five minutes before wiping away debris.
Rubbing alcohol is your second option. It dissolves earwax effectively because wax is an oily substance. Alcohol cuts through oil well. However, use it carefully since it can damage certain earbud materials if you’re not gentle. Save this for stubborn wax that hydrogen peroxide didn’t fully remove.
Mild soap with lukewarm water works only for removable ear tips. Never pour water directly on your earbuds themselves. This combination is safe for rubber or silicone tips. Soak the tips briefly, then scrub gently with a soft cloth.
Mounting putty offers a different approach. This sticky substance can mechanically lift wax from the mesh without any liquid. Press it gently onto the mesh and pull away slowly. This method works well if you prefer avoiding liquids near your electronics.
Always start with the gentlest option first. Hydrogen peroxide is your safest starting point. Only move to stronger solutions if needed. Never mix cleaning solutions together, as this creates unpredictable reactions. Store your chosen solution in a cool, dry place away from direct sunlight. Check expiration dates before use to ensure effectiveness.
Common Mistakes That Damage the Mesh
Many people accidentally make their earbud problems worse when trying to clean the mesh. Understanding these mistakes helps you protect your earbuds while removing wax buildup.
Pushing wax deeper into the mesh is the most common error. When you apply too much pressure during cleaning, wax moves further into the grill instead of coming out. The mesh has tiny openings, and aggressive scrubbing forces debris through these spaces. This makes the sound quality even worse. Always use gentle, light motions when wiping the mesh.
Using excessive force on the delicate mesh causes physical damage. The mesh grill is thin and fragile. Rough brushing or hard scraping can bend or tear the material permanently. Once the mesh tears, sound leaks out in odd directions and the earbud becomes harder to repair. Your touch should feel almost like you’re barely making contact with the surface.
Skipping the softening step wastes your effort. Some people try to remove wax immediately without letting cleaning solutions work first. Dry wax is stubborn and requires more pressure to remove, which increases damage risk. Hydrogen peroxide needs about five minutes to soften the wax properly. This waiting period is not optional if you want safe results.
Not allowing complete drying time creates new problems. Moisture inside the earbud can damage electronics or create connection issues. After cleaning, your earbuds need at least two hours in a warm, dry area. Rushing this step means you’ll experience sound cutting out or connectivity problems.
These mistakes are easy to avoid once you know about them. Patience and gentle technique protect your earbuds while effectively removing wax buildup.
Troubleshooting: When Sound Quality Doesn’t Improve
Your earbuds might still sound muffled even after cleaning. This happens because wax can hide deeper in the mesh or you may have missed some spots during your first attempt.
Check if wax remains inside the mesh. Look closely under bright light at the grill area. You might see small particles still stuck in the openings. Sometimes wax dries quickly and hardens again after exposure to air.
Repeat the cleaning process more carefully. This time, focus on areas where sound seems weakest. Apply hydrogen peroxide again and wait the full five minutes. Wax needs time to soften properly before removal.
Consider that the mesh itself might be damaged. If you used too much pressure during cleaning, tiny holes in the mesh could have enlarged. Damaged mesh lets sound escape instead of projecting forward into your ear.
Test your earbuds with different ear tip sizes. Sometimes a poor fit lets wax bypass the rubber tip and reach the mesh faster. A proper seal prevents wax from traveling deeper into the device.
Allow extra drying time between cleaning attempts. Moisture trapped inside the earbud can muffle sound just like wax does. Wait at least three hours before testing again after cleaning.
Try a second cleaning solution if the first didn’t work. Rubbing alcohol dissolves wax differently than hydrogen peroxide does. Switching solutions sometimes removes stubborn particles the first method missed.
If sound quality still doesn’t improve after these steps, the internal speaker components may have wax damage. At this point, professional service becomes your best option since internal repairs require specialized tools.
Preventing Future Wax Buildup
Preventing wax buildup is easier than fixing it later. The best approach involves simple daily habits that keep your earbuds clean and functional.
Start by cleaning your earbuds regularly with a dry cloth. Wipe the mesh grill after each use. This removes fresh wax before it hardens and penetrates deeper into the mesh. A quick 10 second wipe makes a huge difference over time.
Take listening breaks throughout your day. Continuous earbud use increases earwax production in your ear canal. When you give your ears rest periods, less wax accumulates overall. Your ears naturally shed wax, so shorter wearing sessions mean less buildup on your buds.
Keep your ears clean and healthy. Wash behind your ears and around the ear canal opening regularly. Excess earwax starts in your ear, not on your earbuds. Managing earwax production at the source prevents most mesh grill problems.
Never share your earbuds with other people. Sharing introduces different earwax types to your device. Each person’s earwax has different consistency and composition. Mixing earwax types can create stubborn buildup that’s harder to remove.
Store your earbuds in a clean, dry case when not in use. Moisture and dust attract wax particles and create sticky residue. A protective case keeps your mesh grill exposed to fewer contaminants.
Be gentle when inserting and removing your earbuds. Rough handling can damage the mesh or push wax deeper inside. Smooth, careful placement protects the delicate grill structure.
Consider using disinfectant wipes designed for electronics on your mesh once weekly. These wipes kill bacteria and dissolve light wax deposits before they become problems. This simple weekly habit prevents most serious clogging issues from developing in the first place.
Final Thoughts
Clogged mesh grills happen to almost everyone who wears earbuds daily. Wax buildup is a normal part of using these devices. The good news is you can fix this problem at home.
Hydrogen peroxide works well as your first cleaning option. It softens wax gently without harsh chemicals. Give it five minutes to work before touching the mesh.
Patience matters more than force during this process. Rushing the cleaning often pushes wax deeper into the mesh. Slow, careful movements protect your earbuds better.
Your earbuds deserve regular care, not just emergency fixes. Weekly cleaning habits prevent major clogs from forming. This saves you time and frustration later.
Sound quality problems usually point back to wax buildup. Clean mesh grills mean clearer audio every time. Your music and calls will sound noticeably better.
Some clogs need more than one cleaning attempt. Stubborn wax sometimes hides deep inside the mesh. Don’t feel discouraged if the first try doesn’t fully work.
Think about your daily habits around earbud use. Simple changes like taking breaks reduce wax production. Storing earbuds properly also keeps dust and debris away.
Mesh grills are delicate parts of your earbuds. Treat them with the same care you’d give any electronic device. Gentle handling extends their lifespan significantly.
Fixing a clogged mesh grill doesn’t require expensive tools or trips to a repair shop. Basic household items handle most wax problems effectively. You just need the right technique and a little patience.
Remember that prevention beats repair every single time. Building simple cleaning habits now means less wax buildup later. Your earbuds will thank you with better sound and longer life.
Frequently Asked Questions
Why does earwax get stuck in the mesh grill so easily?
Earwax is sticky and naturally accumulates in your ear canal. When you insert earbuds, the mesh grill acts as a barrier, but wax still finds its way through the rubber tips. The mesh openings are small enough to trap particles while still allowing sound to pass through. Over time, layers of wax build up inside the grill and block sound from reaching your ear clearly.
Can I use water to clean a clogged mesh grill?
Plain water alone won’t dissolve earwax effectively. However, you can use mild soap mixed with lukewarm water, but only on removable ear tips. Never soak the earbud itself in water. For the mesh grill itself, hydrogen peroxide works much better because it softens wax without damaging electronics. Apply it carefully with a small brush or cloth, let it sit for 5 minutes, then gently wipe away the softened debris.
How long does it take to clean a clogged mesh grill?
The process takes about 10 to 15 minutes total. You’ll spend 5 minutes waiting for the softening agent to work, then another 5 to 10 minutes gently removing the wax. Allow extra time for drying afterward. Don’t rush this step. Patience prevents you from pushing wax deeper into the mesh or damaging the delicate grill structure.
What happens if the mesh grill gets damaged during cleaning?
A damaged mesh grill can’t filter wax effectively anymore. Sound quality drops further, and wax reaches internal components more easily. Avoid using excessive pressure or sharp tools on the grill. If damage occurs, your earbud may need professional repair or replacement.

Hi, I’m Rosie Tate — a tech enthusiast, gadget geek, and the creator of RapidConvertLab! 🚀 I’ve spent years exploring the ever-evolving world of electronics, smart devices, and Amazon’s hidden tech treasures. Through my honest, hands-on reviews, I help everyday shoppers cut through the noise and pick gadgets that truly deliver value. When I’m not testing a new device, I’m probably unboxing one! 📦✨