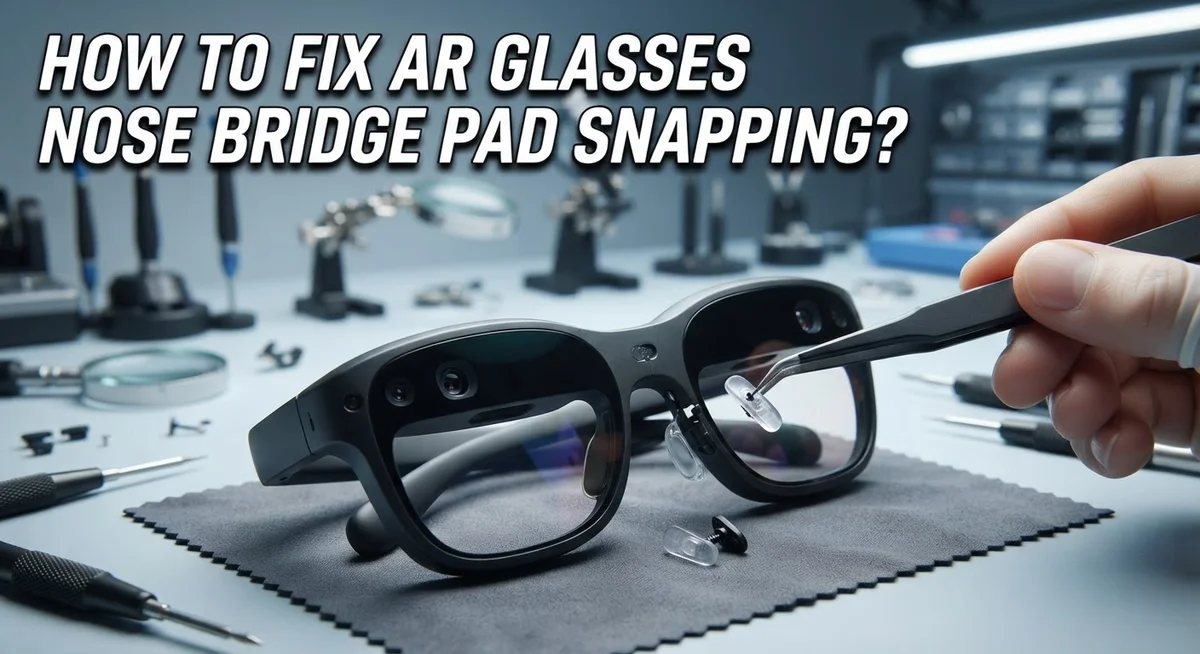
How To Fix AR Glasses Nose Bridge Pad Snapping?
Do your AR glasses keep sliding down your nose? A snapped nose bridge pad can ruin your experience fast. It breaks the comfort you need for long wear sessions.
This problem happens more often than you think. Nose pads take constant pressure every time you put your glasses on or adjust them. Over time, they crack, stretch, or pop right off.
The good news? You can often fix this issue yourself. This guide walks you through simple steps to repair snapped nose pads on your AR glasses.
We will cover both snap-on and screw-in pad types. You will learn how to remove damaged pads safely. We also show you how to install new ones correctly.
In a Nutshell
- Identify your pad type first. Check if your AR glasses use snap-on or screw-in nose pads. This tells you exactly which method to use.
- For snap-on pads, gently pry out the old pad using a flathead screwdriver or butter knife. Push the new pad firmly into the socket until it clicks.
- For screw-in pads, use a small screwdriver to loosen or tighten the screw. Turn it clockwise to secure the pad in place.
- Always check alignment. Hold your glasses at eye level and make sure both pads sit at the same height.
- Avoid over-tightening screws. This mistake often causes more damage and can strip the tiny threads.
- Watch for stretched mounting holes. If a hole feels loose or won’t hold a screw, it cannot be fixed with basic tools.
- See an optician when needed. Professional help is best for stretched holes or frame damage that DIY methods cannot solve.
Understanding Nose Pad Attachment Types
AR glasses nose pads connect to your frames using one of two main attachment systems. Understanding which type you have is the first step toward fixing a snapped pad.
Snap-on pads work like a puzzle piece. The pad has a plastic or rubber post that fits into a socket molded into your frame. When you press the pad onto the frame, it clicks into place. This design offers quick removal and installation. You do not need tools to swap pads. The connection relies on friction and the shape of the post matching the socket perfectly.
Screw-in pads use a different approach. A small metal or plastic screw passes through the pad and threads into the frame. You tighten or loosen this screw with a screwdriver. This method provides a more secure hold than snap-on designs. The screw can be adjusted for tension, which helps with fit customization.
The key difference affects how each type fails. Snap-on pads snap when the post breaks or the socket becomes stretched and loose. Screw-in pads fail when the screw strips the mounting hole or when the screw itself breaks.
Identifying your type matters because repair methods differ completely. Look closely at your glasses. If you see a visible screw on the nose pad, you have a screw-in system. If the pad appears smooth with no screw visible, it is likely snap-on. You can also try gently pulling on the pad. Snap-on pads pop out easily. Screw-in pads stay firmly attached.
Some AR glasses combine both systems, using snaps on one side and screws on the other. Check both sides of your nose bridge before starting any repair work.
Why Nose Bridge Pads Snap or Break
Nose bridge pads snap or break for several clear reasons. Understanding why this happens helps you prevent future damage and fix the problem correctly.
Wear and tear is the most common cause. Every time you put on your AR glasses, you stress the pads slightly. Over months and years, the material becomes brittle and eventually cracks or breaks completely. This is especially true if you remove and reattach your glasses frequently throughout the day.
Material fatigue plays a big role too. Nose pads are typically made from silicone, rubber, or plastic. These materials gradually lose their flexibility when exposed to body heat, sweat, and oils from your skin. The pads harden and become less able to flex without snapping.
Improper fit causes many pads to snap prematurely. When pads sit at different heights on each side, one pad bears more pressure than the other. This uneven weight distribution stresses that single pad until it breaks.
Over-tightening screw-in pads is a frequent mistake that leads to snapping. When you tighten the screw too much, you create excessive pressure on the mounting point. The pad itself can crack under this strain, or the screw hole gets stripped and damaged.
Stretched mounting holes happen when snap-on pads are pulled too hard during removal. Once the socket becomes enlarged, the pad no longer fits snugly. It sits loosely and eventually snaps off completely during normal use.
Impact damage from dropping your glasses also causes immediate snapping. A hard fall can crack the pad or break the attachment point instantly.
Knowing these causes helps you handle your glasses more carefully and recognize when professional repair becomes necessary.
Tools You Will Need Before Starting
Before you start fixing your AR glasses nose bridge pad, gather the right tools. Having everything ready makes the repair faster and prevents damage to your frames.
You will need a flathead screwdriver or butter knife. This tool helps you pry out snap-on pads without scratching your frames. Use gentle pressure to avoid cracking the plastic around the pad socket.
A small Phillips or flathead screwdriver works for screw-in pads. Check your specific glasses first to see which type you have. The wrong screwdriver size can strip the screw or slip and damage nearby areas.
Keep a clean cloth nearby. Wipe away dust and debris from the nose pad area before starting. This helps you see the attachment points clearly and prevents dirt from interfering with your repair.
Consider having replacement nose pads on hand. You cannot reuse a snapped pad, so new ones are essential. Make sure they match your attachment type (snap-on or screw-in) and fit your frame model.
A magnifying glass or lamp helps you see small details. Nose pad attachments are tiny, and better visibility prevents mistakes that make problems worse.
Wear safety glasses if you have them. Small plastic pieces can fly off when you pry or remove old pads. Protecting your eyes keeps you safe during the repair.
Have a small container ready to hold screws or small parts. This prevents losing pieces during your repair work.
If your mounting holes appear stretched or damaged, stop here. Professional help from an optician becomes necessary when holes cannot hold attachments properly. Attempting DIY repairs on damaged frames causes more problems than solutions.
Step-by-Step: Replacing Snap-On Nose Pads
Start by positioning your AR glasses on a flat, clean surface with good lighting. This setup prevents losing small parts and helps you see what you’re doing.
Locate the snap on nose pad that broke or needs replacement. Hold your glasses steady with one hand. Take your flathead screwdriver or butter knife and gently insert it under the edge of the old pad.
Apply steady pressure to pry the pad upward. Move slowly around the pad edges to loosen it evenly. Rushing this step can damage the socket or frame. Once loose enough, use your fingers to pull the pad completely free from its socket.
Inspect the socket opening where the pad was attached. Look for debris, dust, or dried adhesive. Wipe the area clean with your cloth. A clean socket ensures your new pad sits properly and stays secure.
Take your replacement nose pad and align it with the empty socket. The pad should fit into the socket opening like a puzzle piece. Push down firmly and evenly across the entire pad surface until you hear or feel it click into place.
Repeat this process on the other side if needed. Make sure both pads sit at the same height. Hold your glasses at eye level and look in a mirror to check alignment.
Test the fit by wearing your glasses for a few minutes. The pads should feel comfortable and stable. If either pad feels loose or shifts around, remove it and reseat it more firmly.
If the socket appears cracked or damaged beyond simple pad replacement, visit an optician. Professional help becomes necessary when mounting areas are compromised.
Step-by-Step: Adjusting and Replacing Screw-In Nose Pads
Screw-in nose pads require a different approach than snap-on pads. These pads use small screws to attach directly to your AR glasses frame. The process is straightforward when you follow the right steps.
Start by examining both nose pads closely. Look for any visible damage or looseness. Hold your glasses up to a light source so you can see the screw heads clearly. A magnifying glass helps if the screws are tiny.
Locate your small screwdriver. Use the correct size to match the screw head, whether Phillips or flathead. An ill-fitting screwdriver can strip the screw and make problems worse.
Gently turn the screw counterclockwise to loosen it. Do not force the screwdriver or apply excessive pressure. Remove the screw completely and set it in your small container so you do not lose it.
Slide the old nose pad off the mounting post. Inspect the post for damage or debris. Wipe it clean with your cloth.
Align your replacement nose pad onto the post. Make sure it sits flat and centered. The pad should rest evenly without tilting.
Insert the screw back through the pad and into the post. Turn it clockwise slowly until snug. This is critical: do not over-tighten. A snug fit means the pad stays secure without crushing the material.
Repeat this process on the other side if needed. Check that both pads sit at the same height by holding your glasses at eye level.
Wear your glasses for several minutes to test the fit. The pads should feel comfortable and stable. If they feel loose or misaligned, visit an optician for professional adjustment. Opticians have specialized tools and expertise for precise fitting.
Checking Alignment and Fit After Repair
After you replace your nose bridge pads, you need to check that everything sits correctly. This step prevents future problems and ensures your AR glasses feel comfortable.
Start by holding your glasses at eye level in front of a mirror. Look at both nose pads from the front. They should sit at exactly the same height. If one pad appears higher or lower than the other, your glasses will sit crooked on your face. Uneven pads cause discomfort and can damage your glasses over time.
Press gently on each pad with your finger. Both pads should feel secure and not move around. A pad that shifts or slides indicates improper installation. Remove it and reinstall it following the correct method for your attachment type.
Put your glasses on and wear them for at least five minutes. Pay attention to how they feel on your nose. The pads should distribute pressure evenly across both sides. If you feel pressure on just one side, alignment is off.
Look in the mirror while wearing them. Your glasses should sit straight on your face without tilting left or right. The frame should not rest too high or too low on your nose.
Check that the pads don’t touch your cheeks or eyebrows. Your field of vision should remain completely clear. If anything feels wrong, remove the glasses and reinspect the pad positioning.
If alignment problems persist after reinstallation, your mounting holes may be damaged. This situation requires professional help. An optician has the tools and experience to fix stretched holes or install pads correctly. They can also ensure your glasses fit your unique nose shape properly.
Common Mistakes to Avoid During Repair
When fixing AR glasses nose bridge pads, certain mistakes can make your repair worse. Understanding what to avoid saves you time and money.
Over-tightening screws is the most common error people make. When you turn the screw too hard, you damage the mounting post inside the frame. The plastic strips or cracks, and the screw won’t hold anymore. Turn screws only until they feel snug. Stop immediately when you feel resistance.
Forcing misaligned pads causes serious problems. If a pad doesn’t slide into place smoothly, don’t push harder. Something is wrong with the socket or the pad itself. Forcing it breaks the mounting area permanently. Instead, remove the pad and inspect both the socket and the replacement pad carefully.
Ignoring stretched mounting holes leads to repeated failures. If screw holes are loose and won’t grip, DIY fixes won’t work. Trying to tighten a screw in a stretched hole just makes the damage worse. You need professional help at this point.
Skipping the alignment check means your glasses won’t fit right. Many people install pads and wear the glasses without testing first. Uneven pads cause discomfort and can slip during use. Always hold your glasses at eye level and compare both sides before declaring the repair complete.
Mixing pad types creates fitting problems. Snap-on pads don’t work in screw-in sockets and vice versa. Check your original pads before buying replacements. The attachment method must match exactly.
Taking time to avoid these mistakes ensures your repair lasts longer and your glasses feel comfortable again.
Troubleshooting Persistent Sliding or Stretched Holes
When your AR glasses slide down your nose repeatedly, the problem usually stems from stretched mounting holes or worn pads that no longer grip properly. This persistent sliding indicates your nose bridge needs attention before the situation worsens.
Stretched holes happen gradually over time. Each time you adjust your glasses or apply pressure to the pads, the material weakens slightly. Eventually, the holes become too large to hold screws or snap fittings securely. You’ll notice the pads feel loose even after tightening them.
Start by examining both mounting holes closely with good lighting. Look for visible cracks, enlarged openings, or material that appears compressed. If the holes look damaged beyond minor wear, professional repair becomes necessary because home fixes won’t restore their original size.
For minor stretching, try this approach: remove the nose pads completely and inspect the socket area. Sometimes debris or dried adhesive collects inside, preventing proper seating. Clean the area gently with a soft cloth. Reinstall your pads and test whether they hold more firmly.
Persistent sliding after cleaning and reinstallation signals deeper damage. At this point, an optician can assess whether the holes need professional drilling or if the frame requires reinforcement. Some frames accept slightly larger replacement pads that grip expanded holes more effectively.
Avoid repeatedly tightening screws as a temporary solution. Over tightening accelerates hole damage and creates new problems. Instead, address the root cause by replacing worn pads or seeking professional help.
The key is recognizing when your glasses need expert attention. If sliding continues despite your efforts, visit an optician who has specialized tools and materials for frame repair. They can determine whether your glasses need reinforcement, new holes, or complete nose bridge replacement.
Final Thoughts
Fixing a snapped nose bridge pad is often simple. Snap-on pads pop out easily with a flathead screwdriver or butter knife. New pads push into place within seconds.
Screw-in pads need a bit more care. A small screwdriver loosens or tightens the screw. Turn it clockwise to secure the pad firmly.
Always match your replacement pad to the original attachment type. Screw-in pads will not fit snap-on sockets, and the reverse is also true.
Balance matters just as much as attachment. Both pads should sit at the same height on your nose. This keeps your glasses level and comfortable throughout the day.
Some repairs go beyond a quick fix. Stretched or damaged mounting holes cannot hold new pads securely. In these cases, home repair will not solve the problem.
An optician has the right tools and experience for these tougher jobs. They can drill, sand, or rebuild the frame safely. This protects your glasses from further damage.
Think about how often the sliding happens. Occasional slipping might just need a quick pad swap. Frequent sliding often points to a deeper structural issue.
DIY fixes work great for minor snapping. They save time and money for simple pad replacements. But do not force a repair if something feels wrong.
Trust your instincts during the process. If pads feel loose after reinstalling them, stop and check the frame. Small issues can turn into bigger ones if ignored.
Nose pads are a small part of your glasses, but they play a big role. They keep your AR glasses steady, comfortable, and functional. A little patience during repair goes a long way toward lasting results.
Frequently Asked Questions
Can I replace nose pads myself or do I need professional help?
You can replace snap-on pads at home with basic tools. A flathead screwdriver or butter knife works well to pry out old pads. Push new ones into the socket until they click. Screw-in pads are slightly trickier but still manageable if you use the correct small screwdriver and turn clockwise to secure.
However, an optician is your best choice for optimal results. They have specialized tools and experience. Professional help becomes essential if mounting holes are stretched or damaged beyond simple repair.
What’s the difference between snap-on and screw-in nose pads?
Snap-on pads clip directly into a socket on your frame. They require no tools except something to pry them loose. Replacement is quick and straightforward.
Screw-in pads use small screws to attach to the frame. They offer more adjustability but need careful handling. Over-tightening these screws causes damage to the frame material.
Always match your replacement pad to the original type. Mixing pad types creates fitting problems and discomfort.
Why do nose pads snap or break?
Pads snap from repeated stress and pressure over time. Regular adjustment, accidental drops, or wearing glasses tightly all contribute. Material fatigue eventually causes failure.
Stretched mounting holes prevent pads from staying secure. This happens gradually as you adjust your glasses repeatedly.
How do I know if my nose pads are properly aligned?
Hold your glasses at eye level and look in a mirror. Both pads should sit at exactly the same height. Misaligned pads cause discomfort and uneven pressure on your nose.
If one pad sits higher than the other, remove both and reinstall them carefully. Take your time during this step.
What should I do if the mounting holes are damaged?
Stretched or damaged holes cannot hold screws effectively. This requires professional frame repair that opticians can handle. They may sand the area and drill new holes if needed.
Attempting repeated DIY fixes on damaged holes wastes time and worsens the problem.

Hi, I’m Rosie Tate — a tech enthusiast, gadget geek, and the creator of RapidConvertLab! 🚀 I’ve spent years exploring the ever-evolving world of electronics, smart devices, and Amazon’s hidden tech treasures. Through my honest, hands-on reviews, I help everyday shoppers cut through the noise and pick gadgets that truly deliver value. When I’m not testing a new device, I’m probably unboxing one! 📦✨