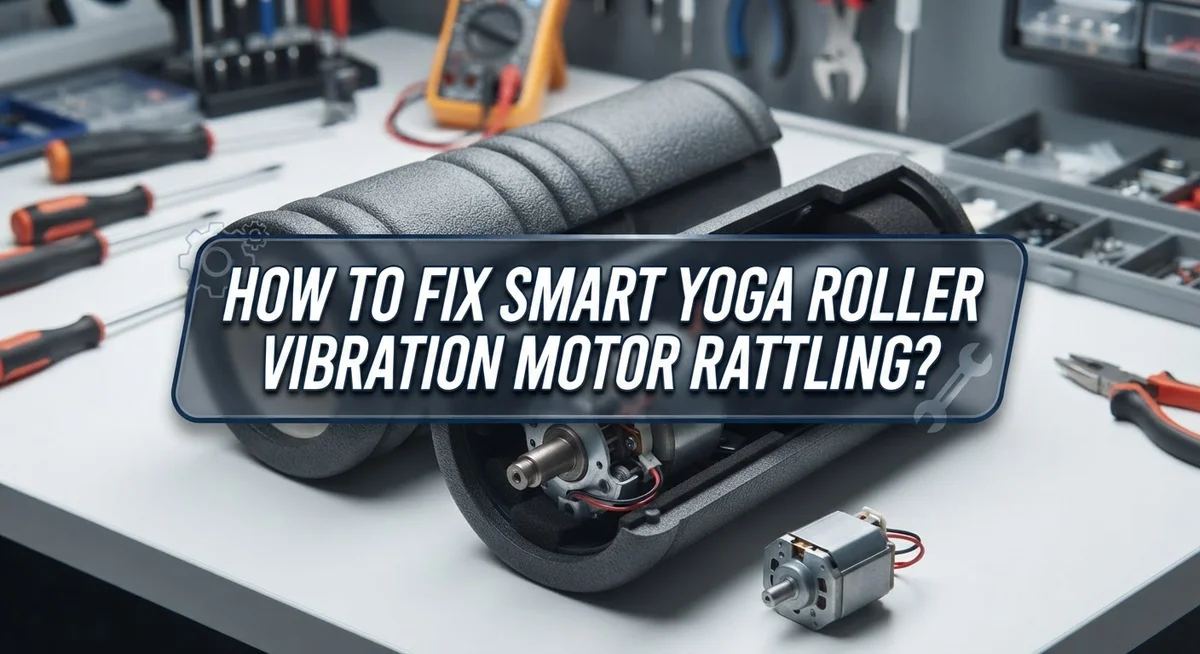
How To Fix Smart Yoga Roller Vibration Motor Rattling?
Does your smart yoga roller rattle instead of hum smoothly? That annoying noise usually means something inside is loose. It could be a bolt, a screw, or even the motor mount itself.
The good news? You can often fix this at home. You do not need to be an expert to solve this problem.
Rattling sounds are your roller’s way of asking for help. Ignoring these noises can lead to bigger issues down the road. The vibration motor might stop working completely if you wait too long.
In a Nutshell
- Find the source first. Most rattling comes from loose screws under the platform or a shaky motor mount. A quick check tells you exactly what needs tightening.
- Tighten before you replace. Loose bolts are the top cause of rattling noises. A simple screwdriver often solves the whole problem.
- Watch for stuck springs. If your roller freezes in demo mode, tiny springs may need removal. Tweezers work best for this delicate task.
- Act quickly on noise. Ignoring early rattling can lead to bigger motor damage later. Small fixes now save bigger repairs down the road.
- Know your power sequence. Press and hold the power button for one to two seconds to start your device. It begins on the lowest vibration setting automatically.
- Inspect regularly. Internal parts wear down over time with regular use. Checking them often keeps your roller running smoothly for longer.
Understanding Why Your Smart Yoga Roller Rattles
Your smart yoga roller rattles because something inside has come loose. This is one of the most common issues with vibrating foam rollers. Understanding the cause helps you fix it faster.
Loose bolts and screws are the main culprit. Your roller contains a motor that vibrates at high speeds. Over time, the bolts holding this motor in place can shake free. The platform itself may also have screws that loosen with repeated use. Each vibration cycle puts stress on these fasteners.
A shaky motor mount creates rattling sounds. The motor sits on rubber or plastic mounts inside your roller. These mounts absorb vibration and keep the motor stable. When they wear down or shift position, the motor bounces around. This bouncing creates that annoying rattle you hear.
Stuck springs cause a different type of problem. Some smart rollers have springs that help with vibration control. If your roller gets stuck in demo mode, these springs may need adjustment or removal. A stuck spring creates rattling as the motor tries to function.
Damaged internal components can also rattle. If you drop your roller or use it roughly, internal parts may crack or break. Broken pieces bounce inside the device and create noise.
The good news? Most rattling issues are fixable at home. You don’t need special tools or expensive repairs. Start by identifying which part is loose. Listen carefully to where the sound comes from. Is it from the bottom? The sides? The handle? This tells you what needs attention first.
Tools You’ll Need Before You Start
Before you start fixing your smart yoga roller, gather the right tools. Having everything ready makes the job faster and easier.
You will need a screwdriver set with both Phillips and flathead options. Most smart yoga rollers use these common screw types on their bottom platform. A set gives you flexibility for different screw sizes.
Tweezers are essential for this repair. They help you remove stuck springs if your roller freezes in demo mode. Regular tweezers work, but needle nose tweezers give you better control in tight spaces.
Grab a flashlight or headlamp to see inside your device clearly. The internal components are small, and you need good lighting to spot loose bolts or damaged parts. A phone flashlight works in a pinch, but a dedicated light frees up your hands.
Keep a small container nearby to hold screws as you remove them. This prevents losing tiny bolts that are easy to misplace. Label the container so you remember which screws came from where.
Cloth or soft towel protects your roller during work. Place it on your work surface to prevent scratches on the device exterior.
A notepad and pen help you document what you find. Write down which screws were loose and where they were located. This information helps you understand the problem and prevents future issues.
Compressed air is optional but helpful. It clears dust from internal components that might affect motor performance. Dust buildup sometimes causes rattling or vibration problems.
Having these tools ready means you can work methodically without stopping to search for supplies. You’ll complete the repair faster and more effectively.
Step-by-Step Guide to Fixing the Rattling Motor
Start by powering off your smart yoga roller completely. Press and hold the power button for one to two seconds until all lights turn off. This prevents accidental activation while you work.
Next, place your roller on a clean, flat surface. Use your flashlight to examine the bottom of the device carefully. Look for any visible gaps or loose components around the motor area.
Begin with the screws. Locate all screws beneath the platform. Use your screwdriver set to gently tighten each one. Turn clockwise slowly. Do not force them, as over tightening can crack the plastic housing. Check screws around the motor mount first, as these are the most common loose points.
Listen for changes as you tighten. Sometimes a single screw causes the entire rattle. Work methodically around the device.
Check the motor mount connection next. This is where the motor attaches to the main body. Look for any bolts or brackets that appear loose. Tighten these connections carefully using the appropriate screwdriver size.
If you discover stuck springs during inspection, use your tweezers to remove them gently. Springs can freeze the device in demo mode and create unusual vibrations. Work slowly and avoid bending them.
After tightening all visible fasteners, power on your roller. Run it through all vibration settings and listen carefully. The rattling should decrease or disappear completely.
If noise persists after tightening everything, inspect for cracks in the plastic casing. Small cracks allow internal components to move freely, creating rattles. Document any damage with photos for warranty purposes if needed.
How to Safely Remove Stuck Springs With Tweezers
Stuck springs inside your smart yoga roller can trap the device in demo mode and create annoying rattling sounds. Removing them safely requires patience and the right technique so you don’t damage other internal components.
Start by powering off your device completely. Wait a few minutes to ensure the motor stops spinning. Place your roller on a clean, flat work surface where you have good lighting. A flashlight or headlamp helps you see into tight spaces where springs hide.
Grab your tweezers and examine the internal area carefully. Look for coiled springs near the motor or vibration mechanism. Springs often get stuck between the motor mount and the casing. Move slowly and avoid forcing anything into the device.
Gently grip the spring with your tweezers at a point where you have good control. Pull steadily without jerking or twisting. If the spring resists, stop and reposition your tweezers rather than applying more force. Springs can snap or break if you pull too hard.
Work one spring at a time. Remove it completely before moving to the next one. Keep removed springs in a small container so you don’t lose them. You may need to reinsert them later if they belong inside the device.
After removing stuck springs, test your roller. Power it on and listen for changes in the rattling sound. If noise continues, the springs may not have been the only issue. Check other fasteners and connections as well.
Never force tweezers into narrow gaps. If a spring feels truly stuck, stop working and consult the device manual. Patience prevents costly damage to your smart yoga roller’s internal systems.
Tips for Keeping Your Roller Rattle-Free Long Term
Keeping your smart yoga roller rattle free requires simple habits and regular attention. Start by storing your roller in a dry place. Moisture can loosen internal connections and cause metal parts to shift. Avoid leaving it in damp basements or humid bathrooms.
Check your roller monthly for loose screws. Set a reminder on your phone to inspect the bottom platform. Tighten any fasteners you find, even if they seem only slightly loose. Small movements grow into bigger problems over time.
Use your roller on stable, level surfaces only. Uneven ground causes vibrations to stress internal components differently. This extra strain can shake bolts loose faster than normal use.
Clean the exterior regularly with a soft, dry cloth. Dust buildup around seams can trap moisture and create corrosion. Never spray water directly on your device.
Listen carefully during each use. Notice any changes in sound or vibration patterns. Early detection of rattling means you can fix problems before they worsen. A slight buzz is normal, but a loud rattle signals trouble.
Avoid dropping or bumping your roller against hard objects. Impact damage weakens the casing and internal mounts. Handle it with care during storage and transport.
Power off your roller when not in use for extended periods. This prevents the motor from working unnecessarily and stressing connections. Let it cool completely before storing it away.
Keep detailed notes about maintenance work you perform. Track which screws you tightened and when. This helps you spot patterns if rattling returns frequently.
Follow these practices consistently. Regular care prevents most rattling issues from developing in the first place. Your roller will stay quiet and perform better for years.
Common Mistakes That Make Rattling Worse
Many people make simple mistakes that turn minor rattling into a serious problem. Understanding these errors helps you protect your investment and avoid costly repairs.
Ignoring early warning signs is the biggest mistake. Rattling sounds start small and seem harmless. You might think the noise will go away on its own. It won’t. Early rattling indicates loose bolts or a misaligned motor mount. Addressing it immediately prevents the problem from spreading to other internal components.
Using your roller on uneven surfaces causes additional stress on internal parts. Vibrations travel differently on bumpy ground. This forces the motor and fasteners to work harder than designed. Always place your roller on flat, stable surfaces during use.
Applying too much force when tightening screws creates a different set of problems. You might think tighter means better. Over tightening strips the threads and cracks the plastic housing. Use steady, moderate pressure instead. Stop when you feel resistance.
Neglecting regular inspections allows damage to accumulate silently. Hidden cracks in the casing worsen over time. Corrosion develops inside where you cannot see it. Check your roller monthly for visible damage and loose components.
Dropping your roller or bumping it against hard surfaces introduces internal misalignment. Even small impacts can shift the motor mount slightly. This creates rattling that spreads throughout the device.
Finally, many people continue using a rattling roller without investigation. Operating a damaged device increases the risk of complete motor failure. Stop using it immediately when you notice unusual sounds. Inspect it thoroughly before your next session. Quick action prevents minor issues from becoming irreversible damage.
Troubleshooting Related Issues: Shut-Offs and Speed Cycling Problems
Your smart yoga roller might shut off unexpectedly or cycle through speeds on its own. These problems often connect to the same rattling issue you’re experiencing.
Shut-offs happen when internal components move out of place. Loose bolts can interrupt the electrical connection between your motor and power source. When the connection breaks, your device powers down automatically. This is actually a safety feature built into most vibration devices.
Speed cycling occurs when your motor receives inconsistent power signals. A rattling motor mount means the vibration mechanism shifts during operation. Your device tries to compensate by changing speeds rapidly. This creates a frustrating cycle where your roller never stays at one setting.
Start troubleshooting by checking all connection points. Power off your device completely and wait several minutes. Open the access panel beneath your roller and inspect every screw. Look specifically at the motor mount bolts and the battery connector area. Tighten anything that feels loose, but avoid over tightening.
If shut-offs continue after tightening, your battery connection might be the culprit. Remove the battery cover and examine the contacts. Corrosion or dirt prevents proper power flow. Gently clean the metal contacts with a dry cloth.
Speed cycling problems sometimes indicate a failing motor. If your roller cycles through speeds without you pressing buttons, the motor controller may be malfunctioning. Test this by holding the power button down. Your device should stay at one speed while you hold it.
Address these issues quickly to prevent permanent damage. Continuing to use a malfunctioning roller stresses internal components further. Document what you’ve checked and what you’ve tightened. This helps you identify patterns and prevents repeated problems.
When to Stop DIY Repairs and Seek Professional Help
DIY repairs work well for minor issues like loose screws and simple bolt tightening. However, some situations require professional attention to prevent further damage to your device.
Stop DIY repairs if you hear grinding or squealing sounds coming from inside the roller. These noises suggest internal motor damage that needs expert diagnosis. Continuing to use the device could make the problem worse and more expensive to fix.
If your roller still rattles after you tighten all visible screws and bolts, the motor mount itself may be damaged. Professional technicians have specialized tools to assess internal components without causing additional harm. They can also determine if the motor needs replacement.
Seek professional help when the rattling is accompanied by burning smells or visible cracks in the outer casing. These signs indicate serious electrical or structural problems that DIY methods cannot safely address.
If your roller shuts off randomly even after you’ve checked all connections, the electrical system needs professional evaluation. Battery issues, wiring problems, and circuit board damage require trained hands and proper equipment.
Contact a professional if you feel uncertain about opening your device or accessing internal parts. Forcing components apart can break delicate wiring and connections. Professionals know the correct disassembly sequence and safety procedures.
When replacement parts are needed, professionals can source genuine components and install them correctly. Using wrong parts or improper installation techniques creates new problems.
Keep detailed notes about what you’ve already tried. This information helps professionals understand your device’s history and speeds up the diagnostic process. Professional repair saves time, prevents mistakes, and protects your warranty coverage in many cases.
Final Thoughts
Fixing a rattling smart yoga roller is simple when you follow the right steps. Most rattling comes from loose screws or a shifted motor mount. A quick inspection often solves the problem in minutes.
Start by checking every screw beneath the platform. Tighten what feels loose but avoid over tightening. This small habit prevents bigger issues later.
Your roller depends on secure internal parts to run smoothly. When bolts stay tight, the motor mount stays stable. This keeps vibration levels consistent and quiet.
Regular checks matter more than people think. A few minutes of inspection each month can save you from costly repairs. Catching problems early keeps your device working longer.
If your roller gets stuck in demo mode, removing the springs with tweezers can help reset it. Handle this step carefully to avoid damaging small parts inside the casing.
Remember that rattling is your roller’s way of signaling trouble. Listening to these sounds early helps you fix issues before they grow. A little attention now prevents bigger repairs later.
Most fixes are easy enough to do at home. You do not need special tools or advanced skills. Patience and care are enough to get the job done.
Your smart yoga roller can serve you well for years with proper care. Simple habits like tightening screws and checking parts regularly make a real difference.
Take a few minutes each week to inspect your device. This small effort keeps your roller quiet, stable, and ready for every session.
A well maintained roller supports better workouts and longer product life. Treat these small fixes as part of your regular routine, and your device will thank you with smooth, quiet performance every time you use it.
Frequently Asked Questions
Why is my smart yoga roller making a rattling sound?
Rattling means loose or damaged internal parts. The motor mount, bolts, or springs inside your roller have shifted out of place. This happens over time as your device vibrates during use. The sound gets worse if you ignore it, so address it quickly.
How do I stop the rattling noise?
Start by powering off your roller completely. Wait a few minutes before opening it. Look beneath the platform and check every screw and bolt. Tighten anything that feels loose using the right tools. Pay special attention to the motor mount connections, as these secure the vibration system.
What if tightening screws doesn’t fix the rattling?
The motor mount itself might be damaged or worn. Internal springs could also be stuck or misaligned. If your roller got stuck in demo mode, trapped springs may cause rattling sounds. Try using tweezers to gently remove and reposition springs if you can access them safely.
When should I stop trying to fix it myself?
Stop DIY repairs if you hear grinding or squealing from inside. Don’t continue if you notice burning smells or visible cracks in the outer casing. If rattling persists after you’ve tightened all visible parts, the electrical system or motor needs professional evaluation. Contact a professional if you feel uncertain about opening your device.
How can I prevent rattling in the future?
Check your roller weekly for loose screws and bolts. Keep it in a dry place away from extreme temperatures. Use your device on stable, flat surfaces only. Regular maintenance catches problems early before they become serious.

Hi, I’m Rosie Tate — a tech enthusiast, gadget geek, and the creator of RapidConvertLab! 🚀 I’ve spent years exploring the ever-evolving world of electronics, smart devices, and Amazon’s hidden tech treasures. Through my honest, hands-on reviews, I help everyday shoppers cut through the noise and pick gadgets that truly deliver value. When I’m not testing a new device, I’m probably unboxing one! 📦✨